Top 7 Social Media Marketing Agencies in Rome Influencer Marketing Hub
* This article was originally published here
Friday, February 28, 2025
Thursday, February 27, 2025
Threads: What it is, how it works, and what’s new in 2025
Threads is a text-based social media app from Meta. It first launched in July 2023, and it’s been making waves ever since. Originally hyped as a Twitter/X alternative, Threads has now grown past 300 million monthly active users as of December 2024.
And it’s not just a Twitter clone. Threads keeps evolving with new features that make it easier (and more fun) to connect:
- Custom feeds allow you to curate content around specific topics
- A web version that makes desktop scrolling and posting easier
- Fediverse integration lets users connect with platforms like Mastodon
- New tools like polls, GIFs, post-editing, and scheduled posts to help boost engagement
But what exactly is the Threads app, and how does it work? Should you use it instead of X? And is it worth adding to your social media strategy?
In this guide, we’re breaking down everything you need to know about Threads — how it works, what’s new, and whether it’s the right platform for you. Whether you’re just checking it out for fun or looking to build an audience, now’s a great time to get started with Threads.
What is Threads and how does it work?
At its core, Threads is a text-based social media app built for real-time conversations and community engagement. The Threads app was originally positioned as an alternative to Twitter/X, but it’s quickly become its own thing.
If you’re new to Threads, the experience might feel familiar. Like X, Threads features a scrolling feed of short text-based posts, where you can:
- Follow conversations and join discussions in real-time
- Post up to 500 characters (longer than X’s 280-character limit)
- Add photos, videos, links, GIFs, and polls
- Reply, repost, and quote posts to keep the conversation going
Your Threads feed is made up of accounts you follow, suggested content from creators and topics the Threads algorithm thinks you’ll like, and custom feeds (a newer feature that lets you curate content around specific interests).
While Threads is closely linked to Instagram, it’s not just an extension of your Instagram feed.
Instead of focusing on visual content, Threads emphasizes text-first interactions, making it a great place for casual conversations with your audience, breaking news and live updates, trending discussions and community engagement.
Recent Threads updates
In response to user feedback, Threads has introduced several new features since launch:
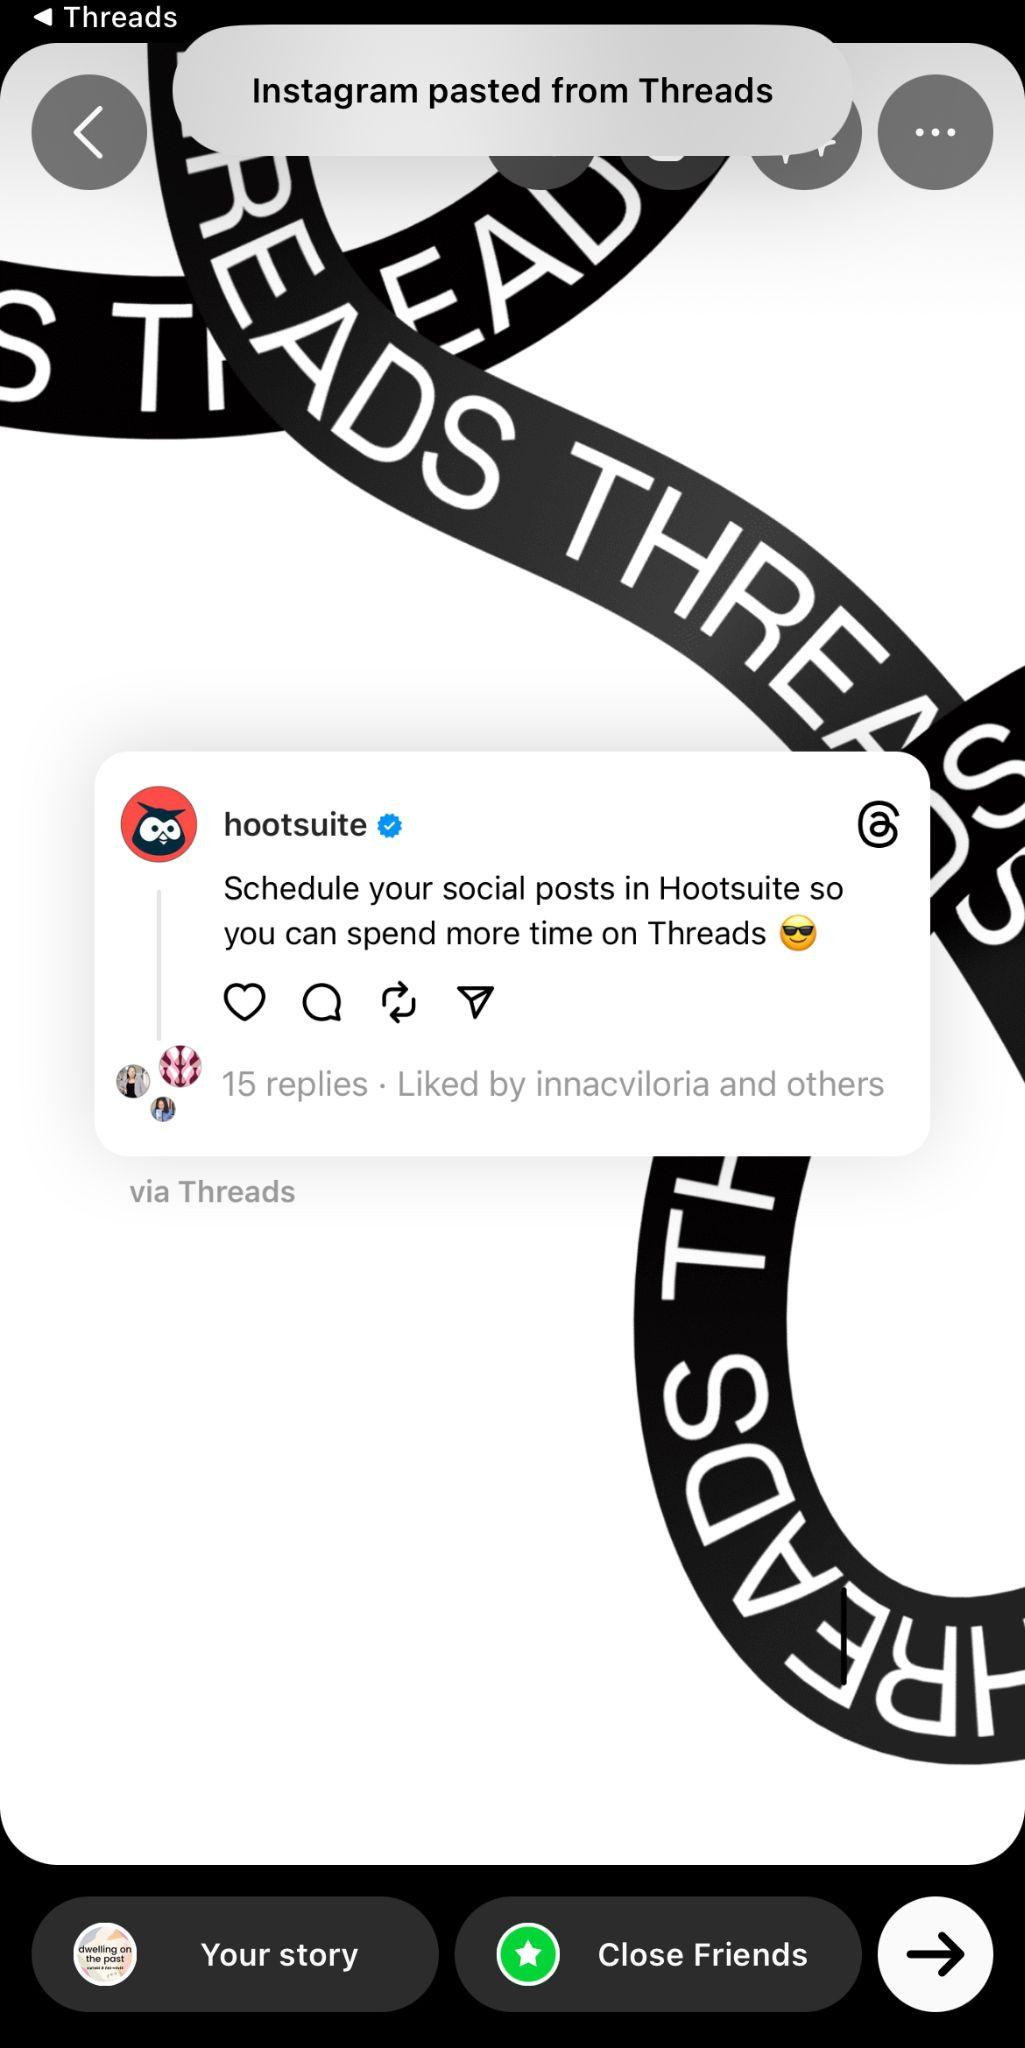
- Post scheduling, Users can now schedule posts directly within the app, allowing for better content planning. (Psstt: you can schedule Threads using Hootsuite, too!)
- Enhanced search and trending topics. Threads is testing advanced search capabilities, including filters by date and account, and AI-generated summaries for trending topics to provide concise overviews.
- Content markup tools: A new markup feature enables users to annotate posts with visual elements like highlighters and arrows, adding a creative touch to reshared content.
View on Threads
How to get started with Threads in 6 steps
Getting started with Threads is quick and easy, especially if you already have an Instagram account. Whether you’re on mobile or desktop, you can be up and running in minutes.
Here’s how to sign up and start using the Threads app in six simple steps:
1. Download the app (or use the web version)
The Threads app is free to download on iOS and Android. Just head to the App Store or Google Play Store and search for “Threads” to download and install the correct app.
Prefer using Threads on your computer? No problem. Threads now has a web version: just go to threads.net and log in.
2. Create your account
Threads is linked to your existing Instagram account, so unlike other apps, you don’t need to sign up from scratch.
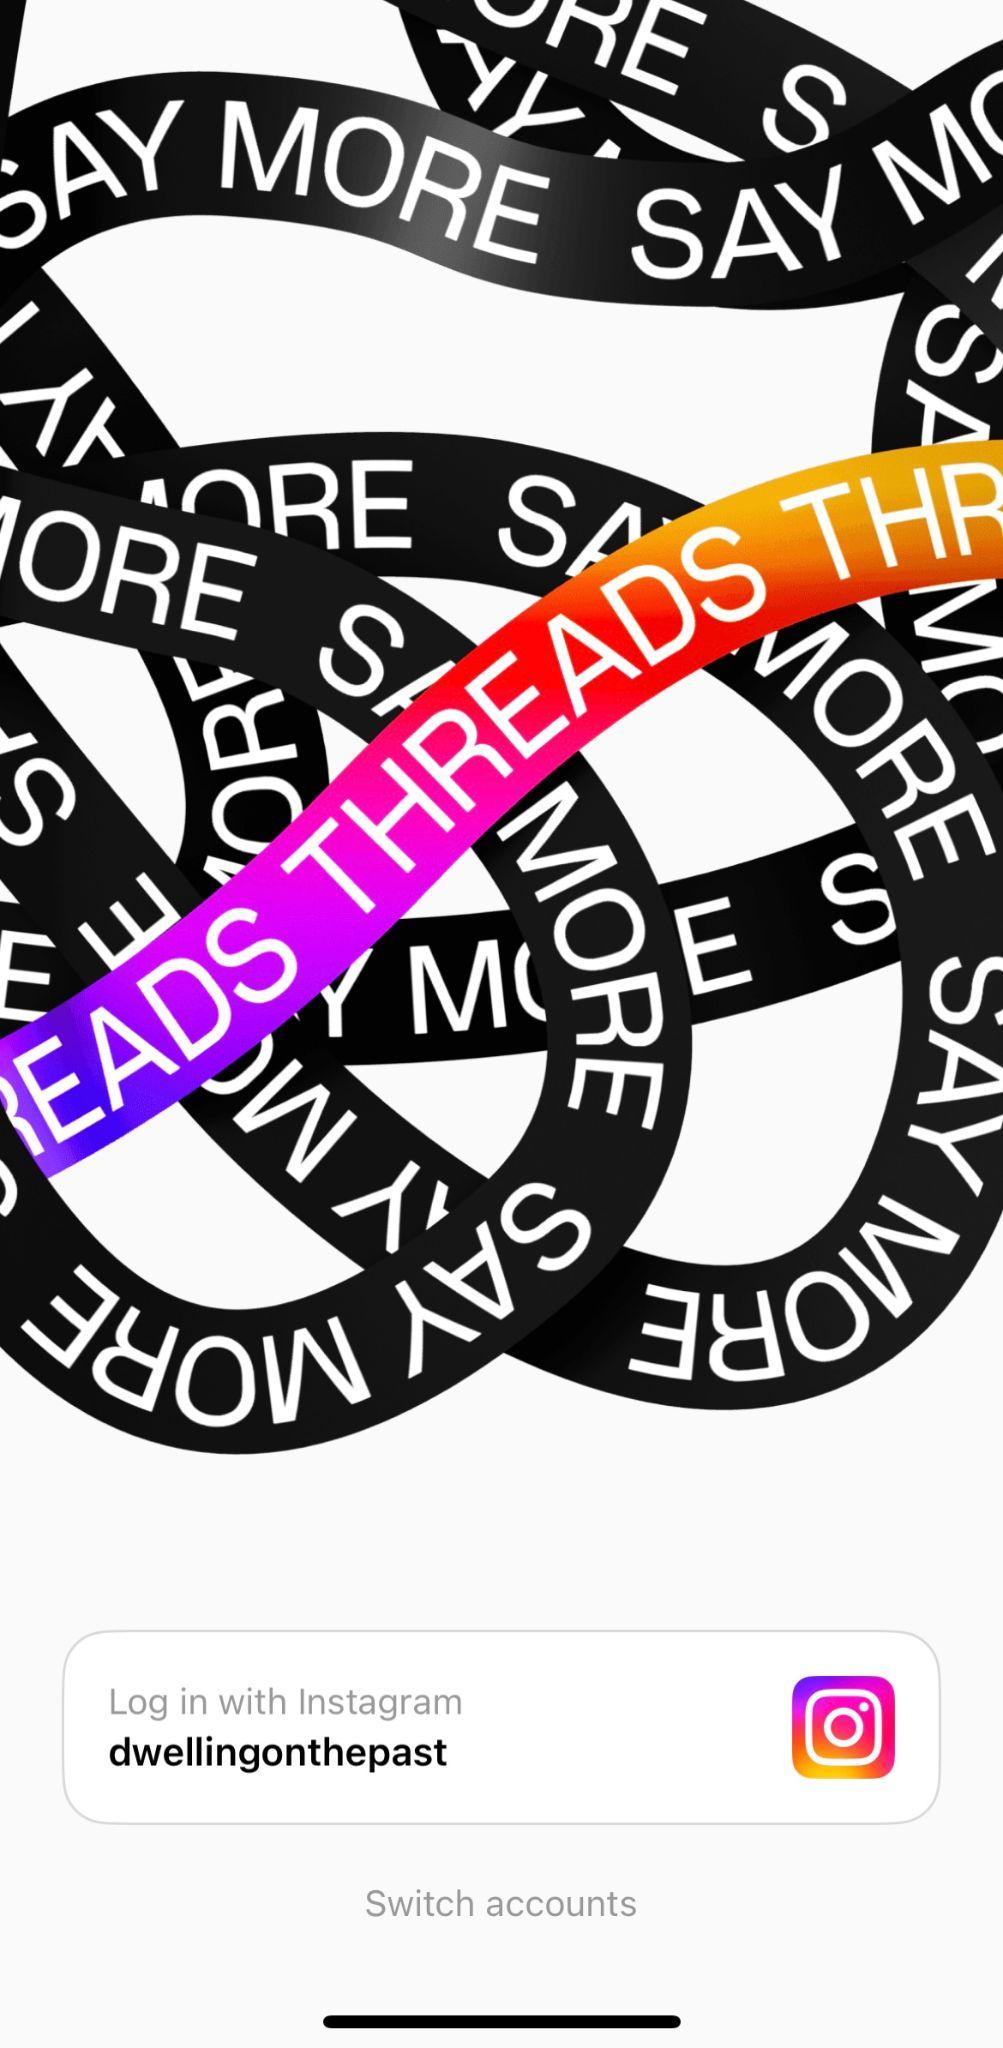
Just click on your username at the bottom of the welcome screen.
Note: If you manage multiple Instagram accounts, you can link each to their own Threads account. Just click Switch Accounts at the bottom of the screen to toggle back and forth.
3. Fill out your profile
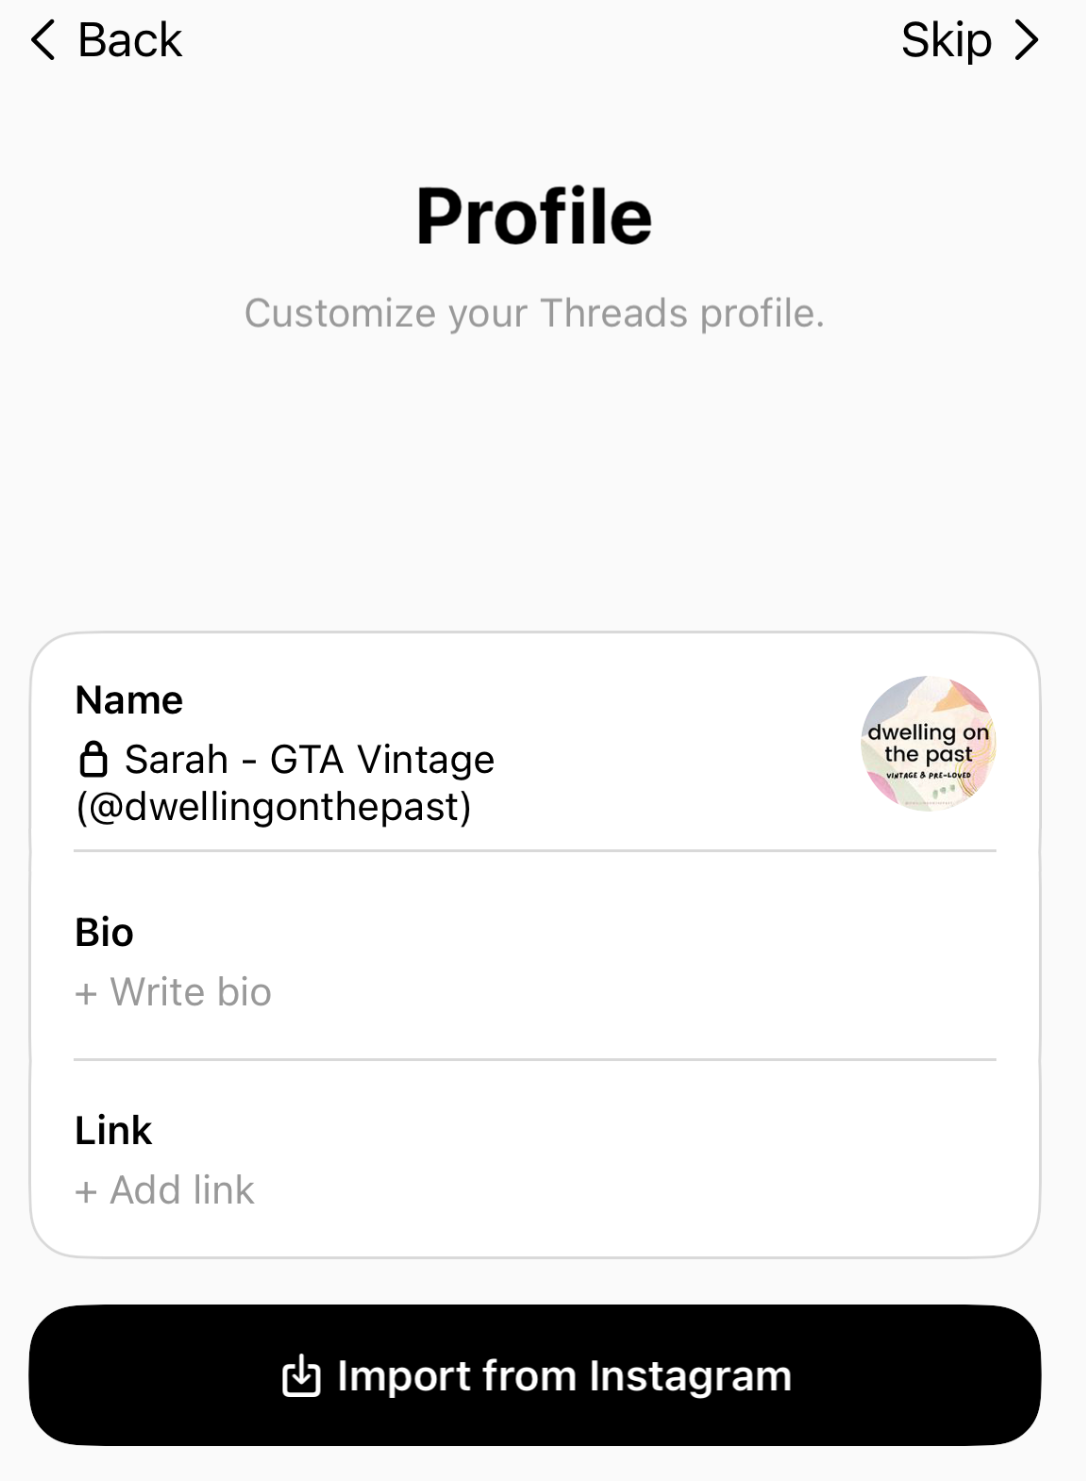
Next, you’ll land on the Profile screen, where you can:
- Import your Instagram bio and profile picture or customize them for Threads.
- Add a link (like your website or Linktree).
- Choose a profile name that matches your Instagram handle (or go for something different).
4. Choose your privacy settings
On this screen, you’ll select from two privacy options:
- Public profile. Anyone on or off Threads can see, share and interact with your content.
- Private profile. Only your approved followers can see and interact with your content.

Already have a private Instagram account? If so, Threads will automatically make your profile private by default.
5. Import the accounts you already follow
Because Threads is so closely linked to Instagram, you’ll have the option to auto-follow the accounts you currently follow on Instagram.
You can choose individual users to follow or click Follow all to import your full follower list.
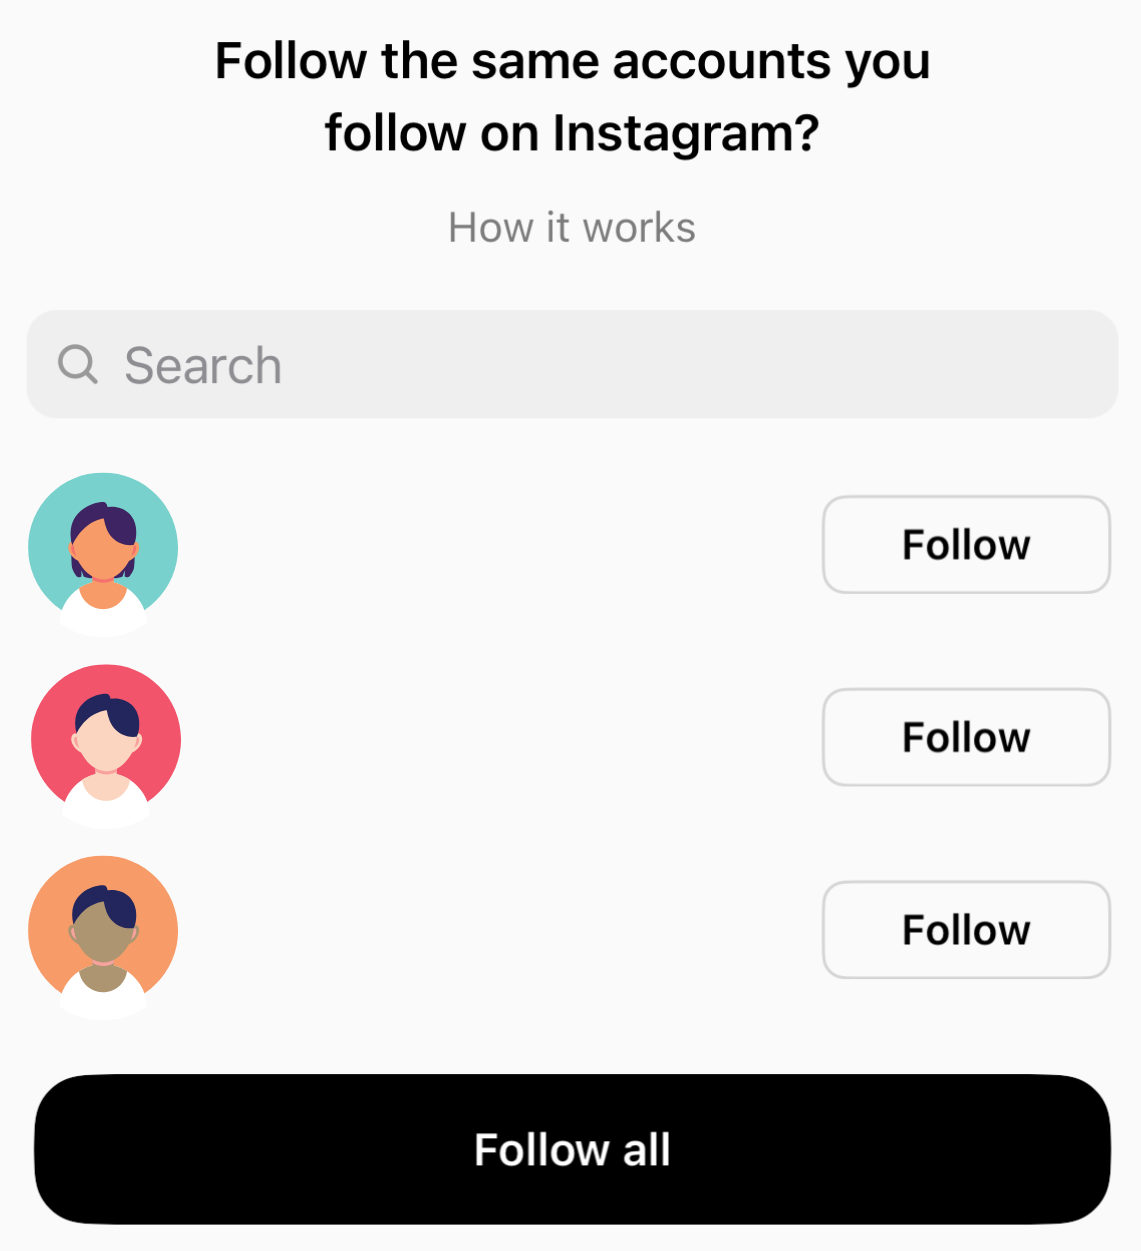
And don’t worry: even if someone hasn’t joined Threads yet, you can follow them in advance, and they’ll show up in your feed when they do.
6. Agree to the terms of use
On the final screen, you’ll be prompted to accept three pieces of information:
- Threads is powered by Instagram and the information from both apps will be used to personalize your ads.
- Threads is integrating with the fediverse, a group of independently hosted but interconnected servers used for web publishing.
- By joining Threads, you agree to Meta’s Terms and Policies. You can click each link to review the specific policy prior to joining.
View on Threads
Once you’re ready to go, click Join Threads, and you’re done!
Once you’re set up on the platform, here are a few things to try right away:
- Check out the “For You” and “Following” feeds to see what’s trending.
- Explore Custom Feeds to curate your own experience based on topics you love.
- Start posting! Try sharing a thread with text, a poll, or a GIF to see how engagement works.
7 things you need to know about Threads
1. Your audience is already there
Threads crossed the 100 million user mark less than a week after its launch, making it the fastest-growing app in history. As of December 2024, it boasts over 300 million monthly active users.
View on Threads
Chances are that your audience is among the millions of new users flooding the gates, so don’t miss an opportunity to meet them where they are!
2. Express yourself with longer posts
Each thread can be up to 500 characters long, almost double X’s (formerly Twitter) 280-character limit.
Longer posts make it easy to express a complete thought or tell more detailed stories without making your followers dig through multiple posts to get all the information.
Pro tip: not sure where to start with your first Thread? Try our free Instagram Threads Generator for inspiration.
3. Engage easily with interactive features
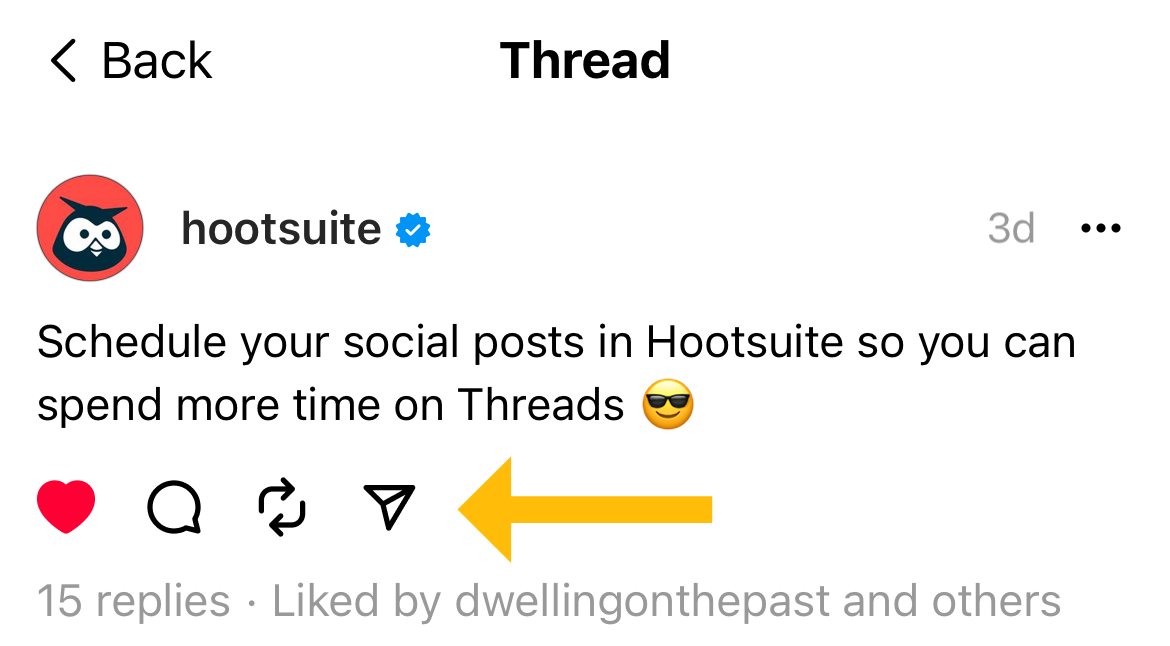
Interacting with other users on Threads is quick and easy. If you’re an active Instagram user, three of the four icons at the bottom of each thread will look familiar:
- A heart to like the post.
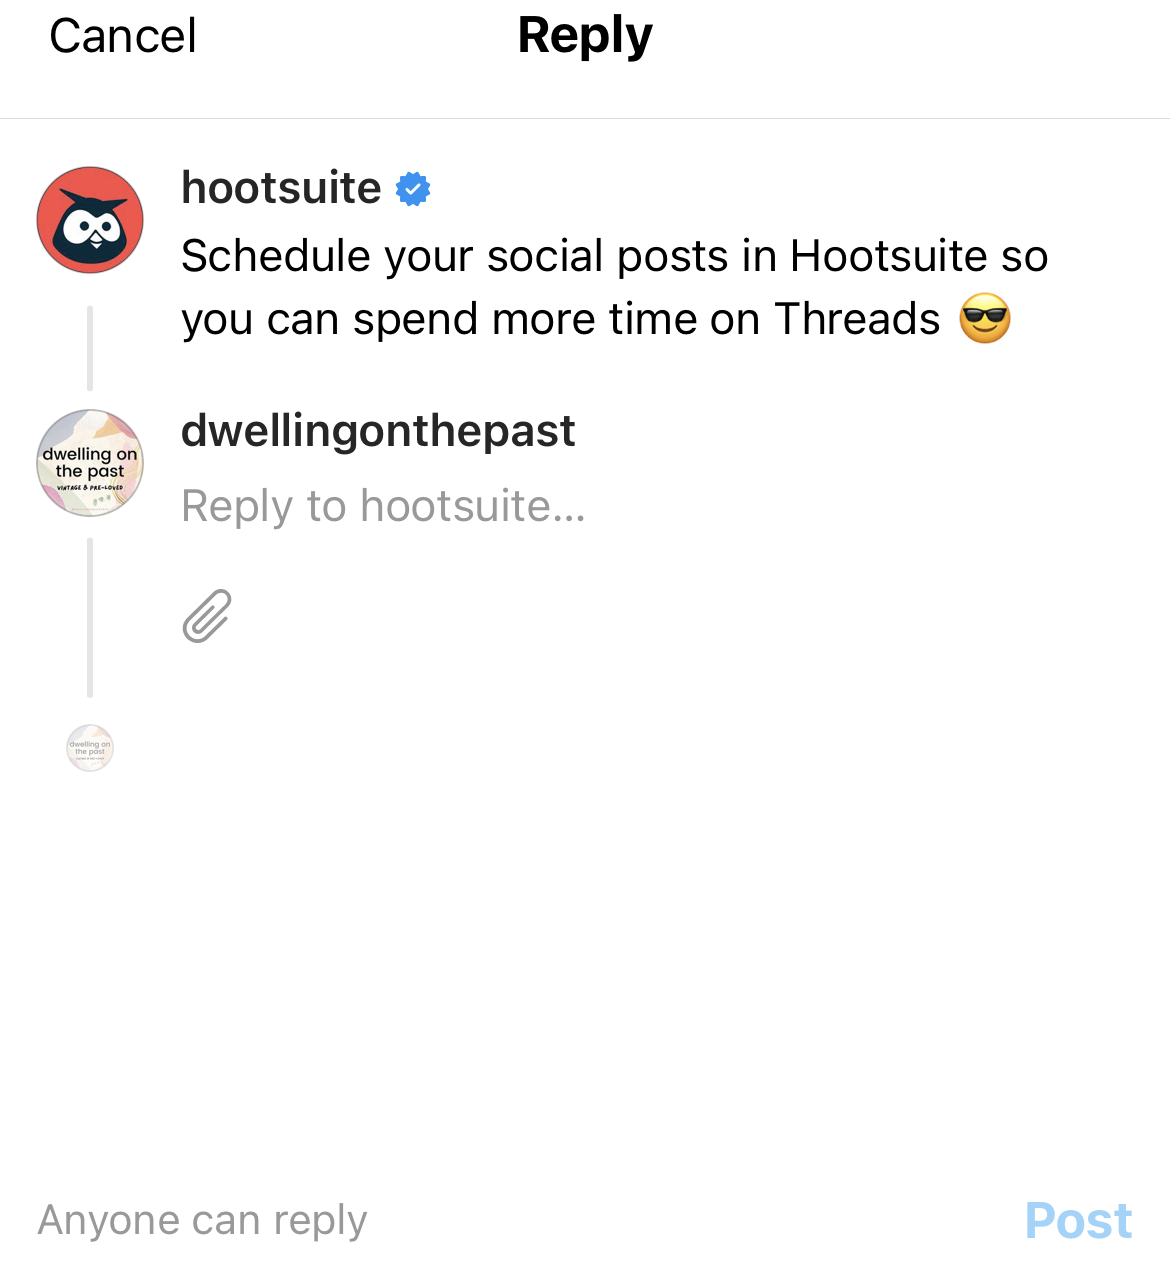
- A quote bubble to reply directly to the thread. (On Instagram, tapping this icon opens the comment section.)
- A repost button. Tapping this allows you to either repost the thread directly to your Threads profile or quote the thread while adding your own thoughts.
- A paper airplane to share the post on another platform. Tap this to add the thread to your Instagram Story or feed, post it on Twitter, copy the link, or share via other means.
4. Cross-post from Threads to Instagram in a snap
Threads and Instagram are closely related, so Meta has made sharing content between the two networks super easy.
You can add your own post or any public thread to your Instagram Story.
Click the paper airplane at the bottom of the thread, select Story, and Instagram will launch automatically. From there, you can edit the post or share it directly with your followers.
Note: While you can customize the background or add stickers, the original thread content remains uneditable.
5. If you’re verified on Instagram, you’ll be verified on Threads
If you’re already verified on Instagram, you’ll automatically be verified on Threads. No need to jump through hoops to get that little blue checkmark again!
Once a verified Instagram account creates an account on Threads, the blue checkmark will appear automatically next to its username.
6. Enhanced content discovery with search and tags
Threads has introduced advanced search capabilities, allowing you to find posts using keywords, profiles, and date ranges.
View on Threads
Plus, the introduction of topic tags (similar to hashtags) helps categorize content, making it easier to discover and engage with discussions relevant to your interests.
View on Threads
7. Upcoming advertising features
Currently, Threads offers an ad-free browsing experience. However, Meta started testing advertisements on the platform in early 2025, aiming to expand its revenue sources.
View on Threads
Initially, a small group of advertisers will be allowed to create and publish ads starting in January. Despite this, Meta’s CFO Susan Li noted that Threads is not expected to significantly drive revenue in 2025, as the company’s focus remains on building consumer value.
Threads vs. X (formerly Twitter): how do they compare?
At first glance, Threads and X (formerly Twitter) seem quite similar: both are platforms centered around sharing short, text-based posts and engaging in public conversations. However, there are key differences that set them apart.
Here’s a side-by-side look at what each app offers.
| Feature | Threads | X (formerly) Twitter |
|---|---|---|
| Post Length | 500 characters per post | 280 characters (longer posts available with X Premium) |
| Media Support | Photos, videos (up to 5 min), links, GIFs, polls | Photos, videos (up to 2m 20s for free users), links, GIFs, polls |
| Verification | Instagram verification carries over automatically | Requires X Premium subscription for verification |
| Direct Messaging |  No DMs available No DMs available |  Supports direct messaging between users Supports direct messaging between users |
| Trending Topics | No trending section yet | Features trending topics and hashtags |
| Ads & Monetization | Currently ad-free, but ads launching in 2025 | Ads appear in feeds, monetization options available for creators |
| Custom Feeds | Users can create and share custom feeds | No equivalent feature |
| Integration with Other Platforms | Plans to support ActivityPub for Mastodon and the fediverse | No cross-platform integration |
| Content Moderation | Follows Instagram’s Community Guidelines | Moderation policies have changed under new management |
| User Base | 300M+ monthly active users as of Dec 2024 | 368M+ monthly active users worldwide |
| Post Editing | Edit button available (15-minute window after posting) | Edit button available only for X Premium subscribers |
While both Threads and X offer platforms for public discourse, your choice between the two depends on your specific needs:
- Choose Threads if you prefer a platform integrated with Instagram, value a higher character limit, and enjoy an ad-free experience (at least for now).
- Opt for X if you seek a platform with established features like direct messaging, trending topics, and are open to exploring monetization options through subscriptions.
Ultimately, both platforms have their unique strengths, and the best choice depends on what aligns with your social media strategy and audience engagement goals.
Save time managing your social media presence with Hootsuite. Publish and schedule posts, find relevant conversions, engage your audience, measure results, and more — all from one easy-to-use dashboard. Try it free today.
The post Threads: What it is, how it works, and what’s new in 2025 appeared first on Social Media Marketing & Management Dashboard.
* This article was originally published here
Wednesday, February 26, 2025
Social media competitor analysis: + free template for 2025
How do you stay ahead of the competition and win on social media? Start with a social media competitive analysis.
It will tell you how you stack up against others in your industry, and surface new opportunities as well as potential threats.
This guide will teach you how to analyze — and learn from — competitor performance. We’ll also list the best social media competitive analysis tools and give you a free template to help you get started.
More of a visual learner? Check out our video to find out how to perform a competitive analysis on social media in just three steps:
What is a social media competitor analysis?
A social media competitor analysis is an analysis of your competition on social media to find out what their strengths and weaknesses are, and how those strengths and weaknesses compare to your own.
It’s a process of benchmarking your own results against the heavy-hitters in your industry, so you can identify opportunities for growth as well as strategies that aren’t performing as well as they should.
A social media competitive analysis, specifically, will help you:
- Identify who your competitors are on social media
- Know which social media platforms they’re on
- Know how they’re using those platforms
- Understand how well their social and content strategies are working
- Benchmark your social media results against the competition
- Identify social threats to your business
- Find gaps in your own social presence
The benefits of running a competitor analysis on social media
Learning about your competitors is not the only reason to do a competitor analysis on social media. It will also give you deeper insights into your own business and your target audience (which likely overlaps with your competitors’ audiences).
Here are some surprising insights a social media competitive analysis can give you:
- Performance benchmarks for your own business, such as average followers, engagement rates, and share of voice
- Ideas for the best times to post on social media (since your audience is likely online at a similar time)
- An understanding of the potential customer pain points
- New (and better) ideas for content formats that may resonate with your audience (or that, conversely, does NOT resonate with your audience, and which you might want to avoid)
- An understanding of how to communicate with your audience on certain platforms (i.e., casually or formally)
- Ideas for ways to differentiate your brand
- And more!
Ultimately, a social media competitive analysis will give you as much as you put into it. You may choose to do a one-off social media competitor report or hire someone on your team whose sole job it would be to keep track of your competitors. Most businesses do something in-between: a quarterly or monthly competitor analysis report.
Whatever level of analysis you choose, the insights will be invaluable.
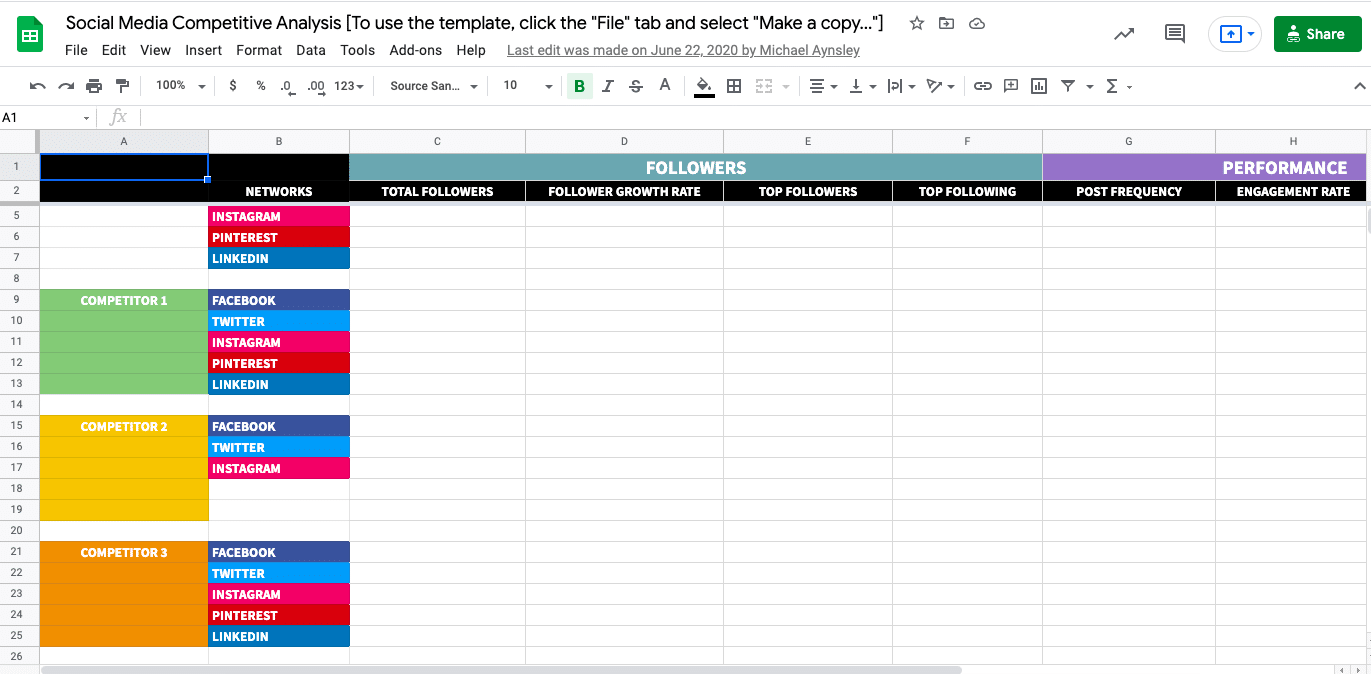
Free social media competitor analysis template
You could create your own spreadsheet to keep track of all the information you gather during your social media competitive analysis.
But if you’d rather get straight to work collecting data and putting it to use, download our free social media competitive analysis template and just start plugging in the information you collect.
This template will also help you track key metrics, industry benchmarks, and KPIs, as well as monitor pricing trends across competitors. PS. There’s a tab for your SWOT analysis, too.
How to do a social media competitor analysis in 4 steps
Before you start, download this free social media competitor analysis template to keep track of your efforts.
Step 1. Find your competitors
Identify your competitive keywords
You probably already know some of the keywords your business is trying to rank for in the search engines. For example, if you work for a Manhattan-based hotel, you’re likely focused on keywords such as “New York hotels,” and “best places to stay in Manhattan.”
But if your property is a boutique hotel with evening wine tastings and local art, you’re not necessarily competing directly with the Holiday Inn. Having a thorough understanding of keywords relevant to your product offering will help you develop a clear picture of who you’re really competing against online.
The Google Adwords Keyword Planner is a great place to identify the keywords most relevant to your brand. Even if you don’t advertise with Google Adwords, this tool is free to use.
To start, use the tool to analyze your website. You’ll get a list of relevant keywords, along with the average monthly searches and estimated level of competition.
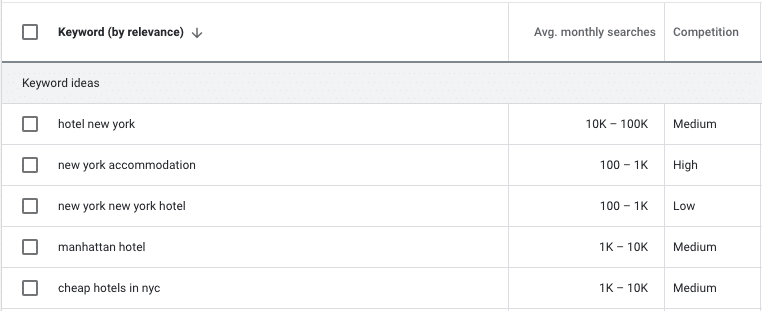
Or, you can enter your known target keywords into the tool. Again, you’ll get a list of related keywords with data on search volume and competition. Use these related keywords to help you narrow your definition of your competitors, so you can make sure you’re analyzing businesses that are truly competing with your own.
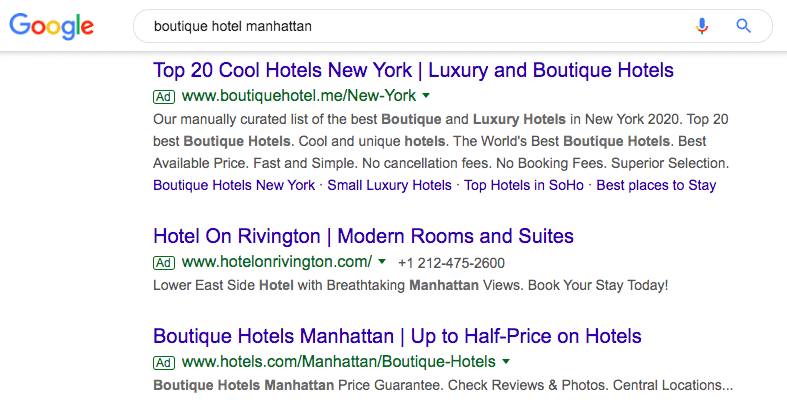
Check who’s ranking for those keywords in Google
Choose the top five or 10 keywords that have the most relevance to your business, and plug them into Google. You’ll soon get a sense of who your top competition is online.
Pay special attention to the brands in your industry that are paying for Google ads to get their names above the organic search results, as they’re putting their money where their marketing ambitions are. Even if they don’t have great organic search rankings (yet), it’s worth checking out how they’re performing on social media.
Click through to the websites of any brands that appear to be potential competitors. Most businesses link to their social media accounts in the header or footer of their website. Enter the links to their social media accounts in your competitive analysis spreadsheet
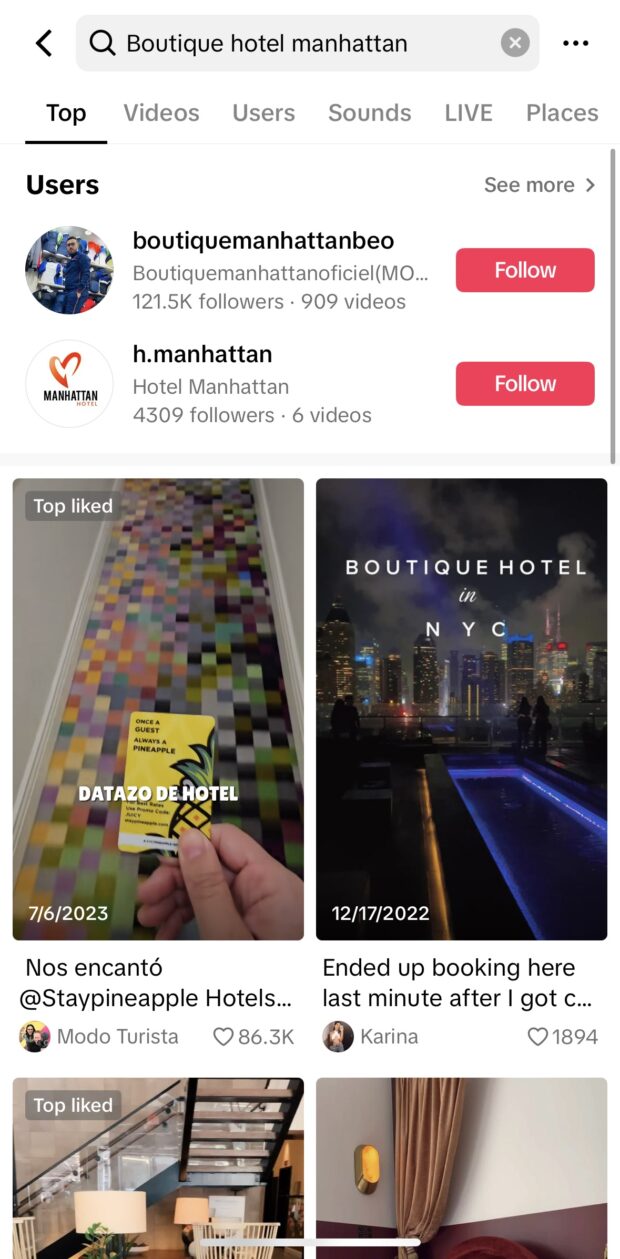
Check who appears in social searches for those keywords
The brands that rank for your keywords in Google are not necessarily the same ones that rank well within the social networks themselves. Since this is a social media competitive analysis, you need to see who comes up tops in social search results, too.
For example, head to Instagram and enter your keyword in the search box. Then, browse the “For you” feed and take note of the brands that show up there.

You may have heard that TikTok has become Gen Z’s favorite search engine. So, if you’re trying to reach a younger audience, make sure to run a search there too.
Find out what similar brands your audience follows
Facebook Audience Insights and X (Twitter) Analytics can give you some good insights into which other brands your target audience follows on these social platforms. If these brands are similar to yours, it’s worth considering them as potential competitors.
To find which brands your audience follows on Facebook:
- Open Facebook Audience Insights
- Scroll down to Top pages
You may find that none of the Pages identified are relevant to your industry, but if they are, add them to your list of competitors.
On X, rather than checking on your whole audience, you can check to see who your top followers are connected to.
- Open X Analytics.
- Scroll down to each of your Top Followers for the last several months
- Click View profile for each Top Follower
- Click Following on their profile to see the full list of accounts they’re following, or click Tweets & replies to see which accounts they interact with
Choose up to 5 competitors to focus on
By now you’ve got a huge list of potential direct and indirect competitors — far more than you could reasonably include in a thorough competitive analysis. It’s time to narrow down your list to the top three to five brands who you are most closely competing with on social media. Choose the brands that have the closest fit to your target audience.
Step 2. Gather intel
Now that you know who your competition is, you need to learn what they’re up to on social media.
Click through to the social media accounts of each of the brands you’ve identified as top competitors. As mentioned above, you can usually find these links in the header or footer of their website. In your social media competitive analysis template, make note of the following:
- What social media platforms are they on?
- How large is their following and how fast is it growing?
- Who are their top followers?
- How often do they post?
- What is their engagement rate?
- What is their social share of voice?
- What hashtags do they use most often?
- How many hashtags do they use?
You can find much of this information about your competitors just by clicking around their social channels. For more streamlined data gathering, check out the social media analytics tools mentioned below.
Don’t forget to track all of these things for your own social media accounts as well. This will help you with your analysis in the next step.
Step 3. Do a SWOT analysis
Now that you’ve gathered all that data, it’s time to analyze it in a way that helps you understand where you stand compared to the competition. As part of this analysis, you’ll also look for potential ways to improve your social media marketing strategy, and potential hazards to watch out for along the way.
A SWOT analysis is a great tool to help you think clearly about all of this information. In a SWOT analysis, you take a hard look at your business and the competition to identify: strengths, weaknesses, opportunities, and threats.
The important thing to know is that strengths and weaknesses involve factors internal to your brand. Basically, these are things you’re doing right, and areas where you could stand to improve.
Opportunities and threats are based on external factors: things happening in your competitive environment that you need to be aware of.
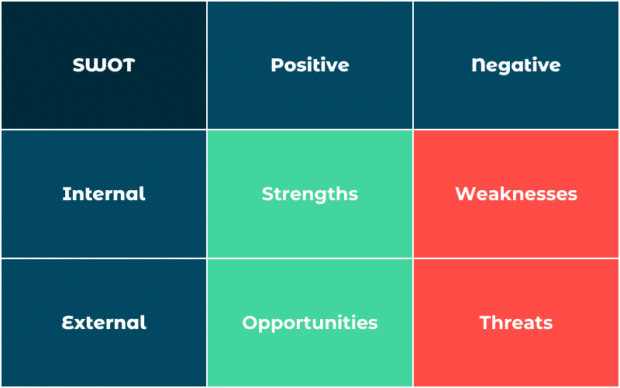
Here are some items to list in each quadrant of the SWOT template.
Strengths
List metrics for which your numbers are higher than the competition. This is your competitive advantage!
Weaknesses
List metrics for which your numbers are lagging behind the competition. These are areas you’ll want to focus on improving through testing and tweaks to your social media strategic plans.
Keep in mind that you could have both strengths and weaknesses for each social network. For example, maybe your LinkedIn follower count is higher than your competitors, but they have better follower growth. Or maybe you have fewer Instagram followers but higher engagement metrics.
Get quite specific here, because these distinctions will help you identify your opportunities and threats.
Opportunities
Now that you can see at a glance where you stand compared to the competition, you can identify potential opportunities to take advantage of.
These opportunities might be areas where you think you could improve compared to your competition. For example, they might be failing to engage with a specific demographic or not posting enough content formats for their audience.
Maybe they’re focusing too heavily on one social platform while ignoring another. These are all opportunities for you to move ahead in the market.
Threats
The threats section of your analysis should include external factors such as:
- A competitor releasing a social media content campaign targeting your audience
- Changes in social media platforms or a shift in user behavior that could impact your business
- A new competitor entering the market
Make sure you stay alert to emerging threats so you can adjust your social media strategy in real-time.
Step 4. Set up social media monitoring to track competitors on an ongoing basis
You’ll need to revisit your social media competitive analysis regularly to keep it current. Make this a regular part of your quarterly or annual reporting and review. That means you’ll need a constant supply of up-to-date information.
Putting a solid social media management strategy in place will equip you with that real-time data to incorporate in your next analysis. This is an especially useful strategy for identifying potential opportunities and threats. By staying updated on competitor content and competitors’ social media strategies, you’ll have the edge in adapting your approach.
We’ll go over some tools you can use for social media monitoring below. Basically, it’s all about being aware of social conversations involving your brand (and product or service), your direct competitors, and your industry. Monitoring competitors’ social media strategies gives you insights into how your competition is performing and where your business can improve.
Record any important information or events you uncover through social media monitoring in the Notes column of your competitive analysis template, and incorporate them into your revised opportunities and threats during your next review.
Record any important information or events you uncover through social media monitoring in the Notes column of your competitive analysis template, and incorporate them into your revised opportunities and threats during your next review.
4 top social media competitor analysis tools
Earlier in step 2, we talked about how to gather intelligence directly from the social networks. Here are some of the best social media competitive analysis tools, social listening tools, and social media metrics platforms that will do the digging for you.
1. Competitive Analysis in Hootsuite Analytics
Whether you’re running a full competitive analysis or just browsing for inspiration, look no further. Hootsuite Analytics does Instagram, Facebook, and X (formerly Twitter) competitive analysis for you.
You can track up to 20 competitor profiles per network, and get a clear view of your strengths and weaknesses — plus actionable insights on the top performing posts, hashtags, and types of content in your niche.
Follow these 4 simple steps to analyze competitors with Hootsuite:
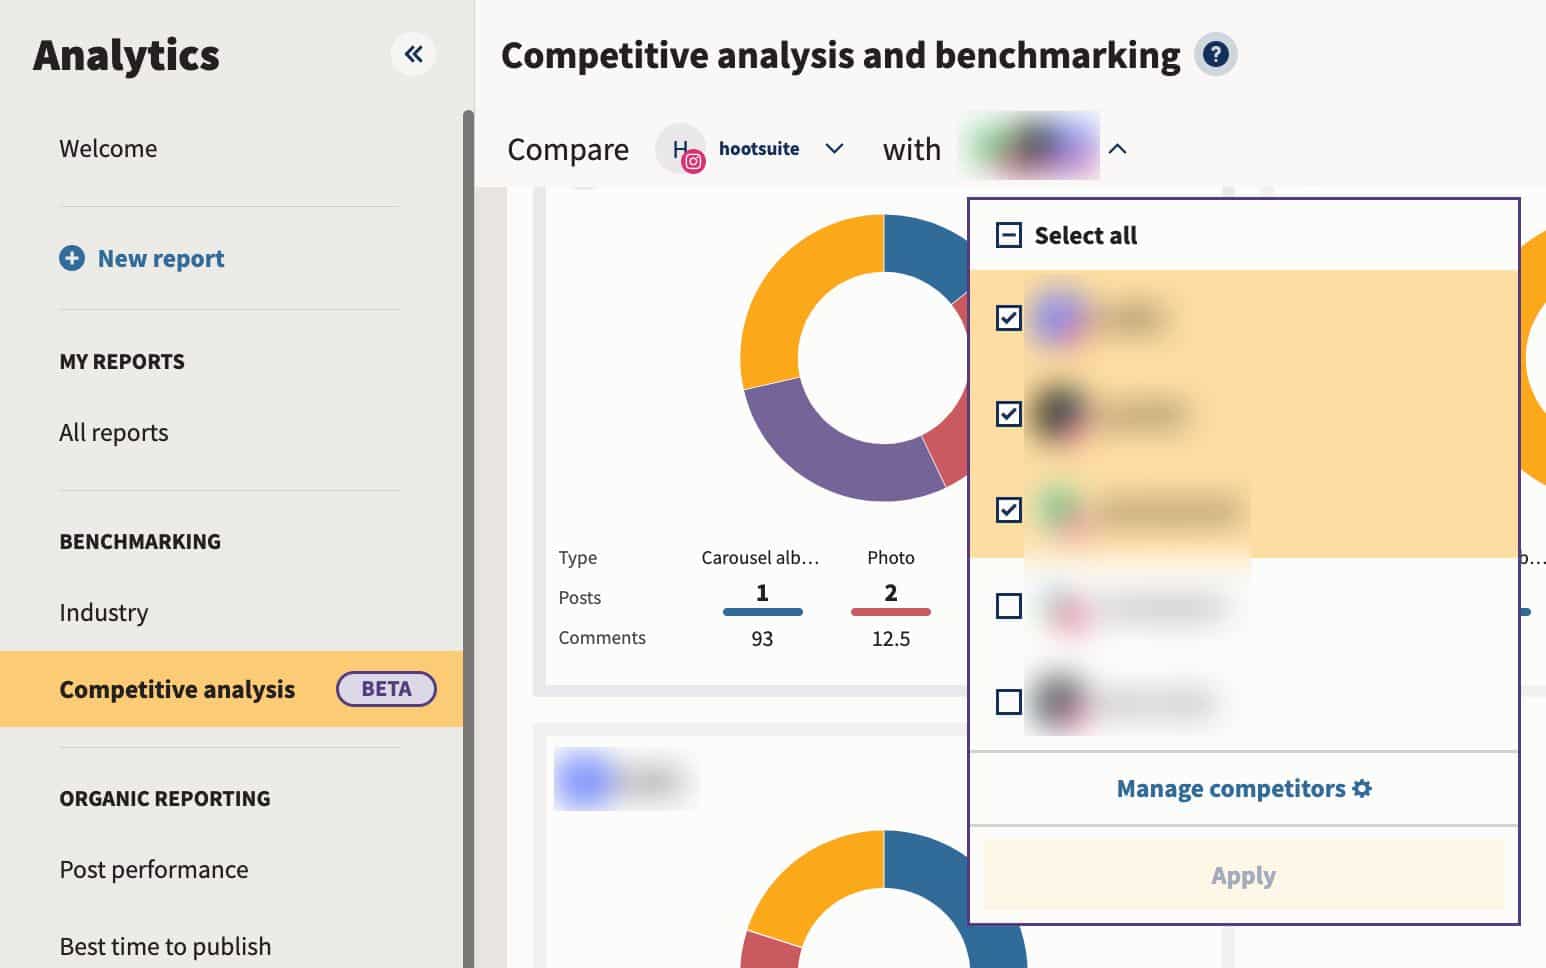
- Sign in to your Hootsuite account and pick Analytics from the main menu on the left side of the dashboard.
- Then, click on Competitive analysis in the Benchmarking section.
- At the top of the page, use the dropdown list of your social profiles to select the one you want to compare to competitors.
- Then, pick the competitors you want to measure your social media performance against. To do that, go into the second dropdown list and check the boxes next to the competitors you want to view. To add competitors, click Manage competitors at the bottom of the dropdown box.
Type the name of a competitor into the search bar and select the correct profile from the dropdown list. Depending on your Hootsuite plan, you can add between 2 and 20 social accounts per network (Facebook, Instagram, and X) to your watchlist.

And that’s it! Now you can browse several competitive reports, including:
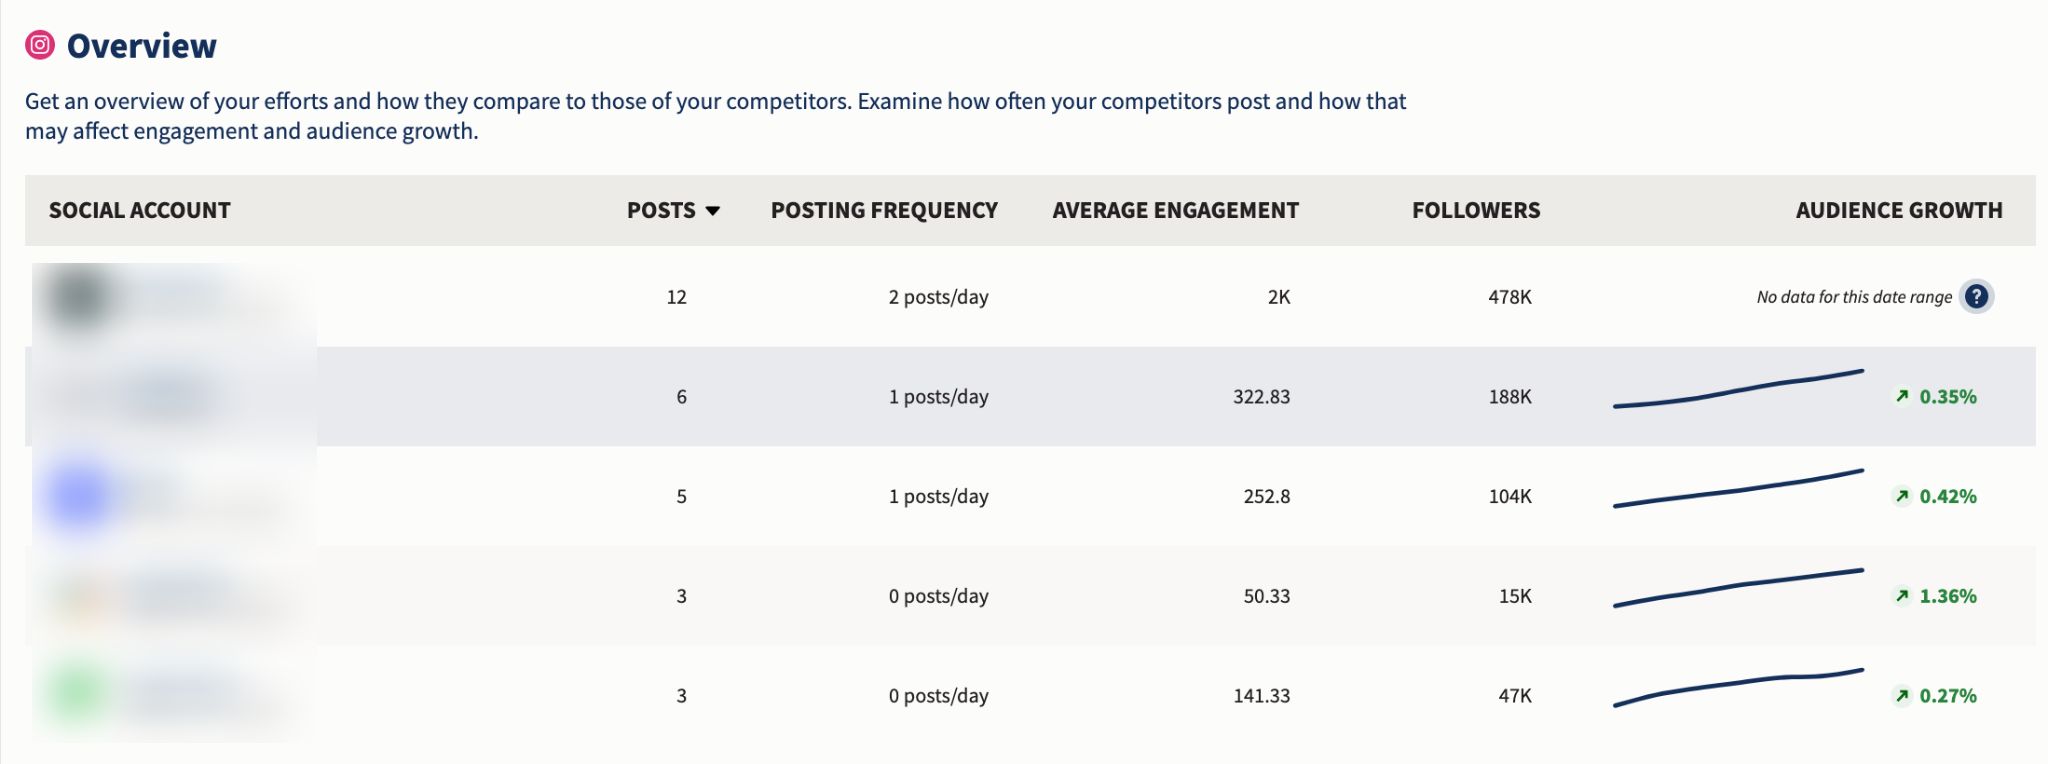
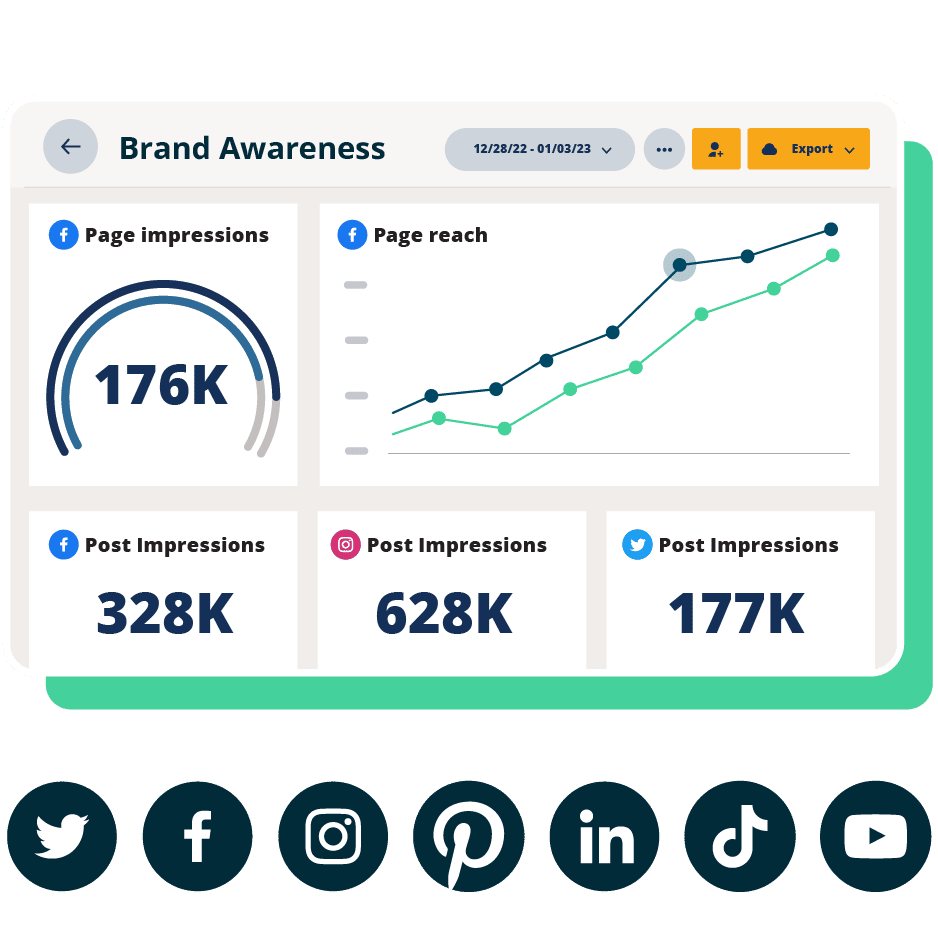
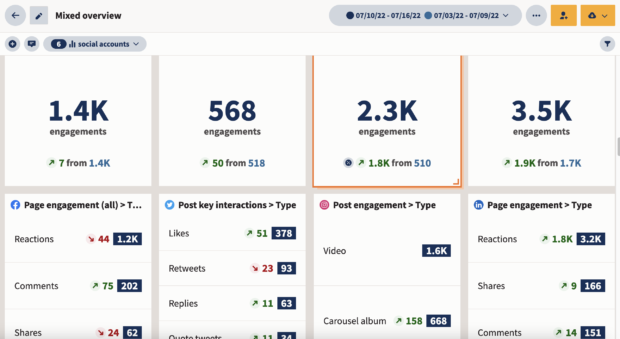
Overview, where you can see the number of posts you and your competitors posted in the selected timeframe (that can be adjusted in the top right corner of the dashboard) as well as every account’s posting frequency, average engagement, number of followers, and audience growth rate.
Post performance, where you can review your content performance and your competitors posts and sort results by likes, comments, and engagement — and quickly fetch inspiration for what to publish next.
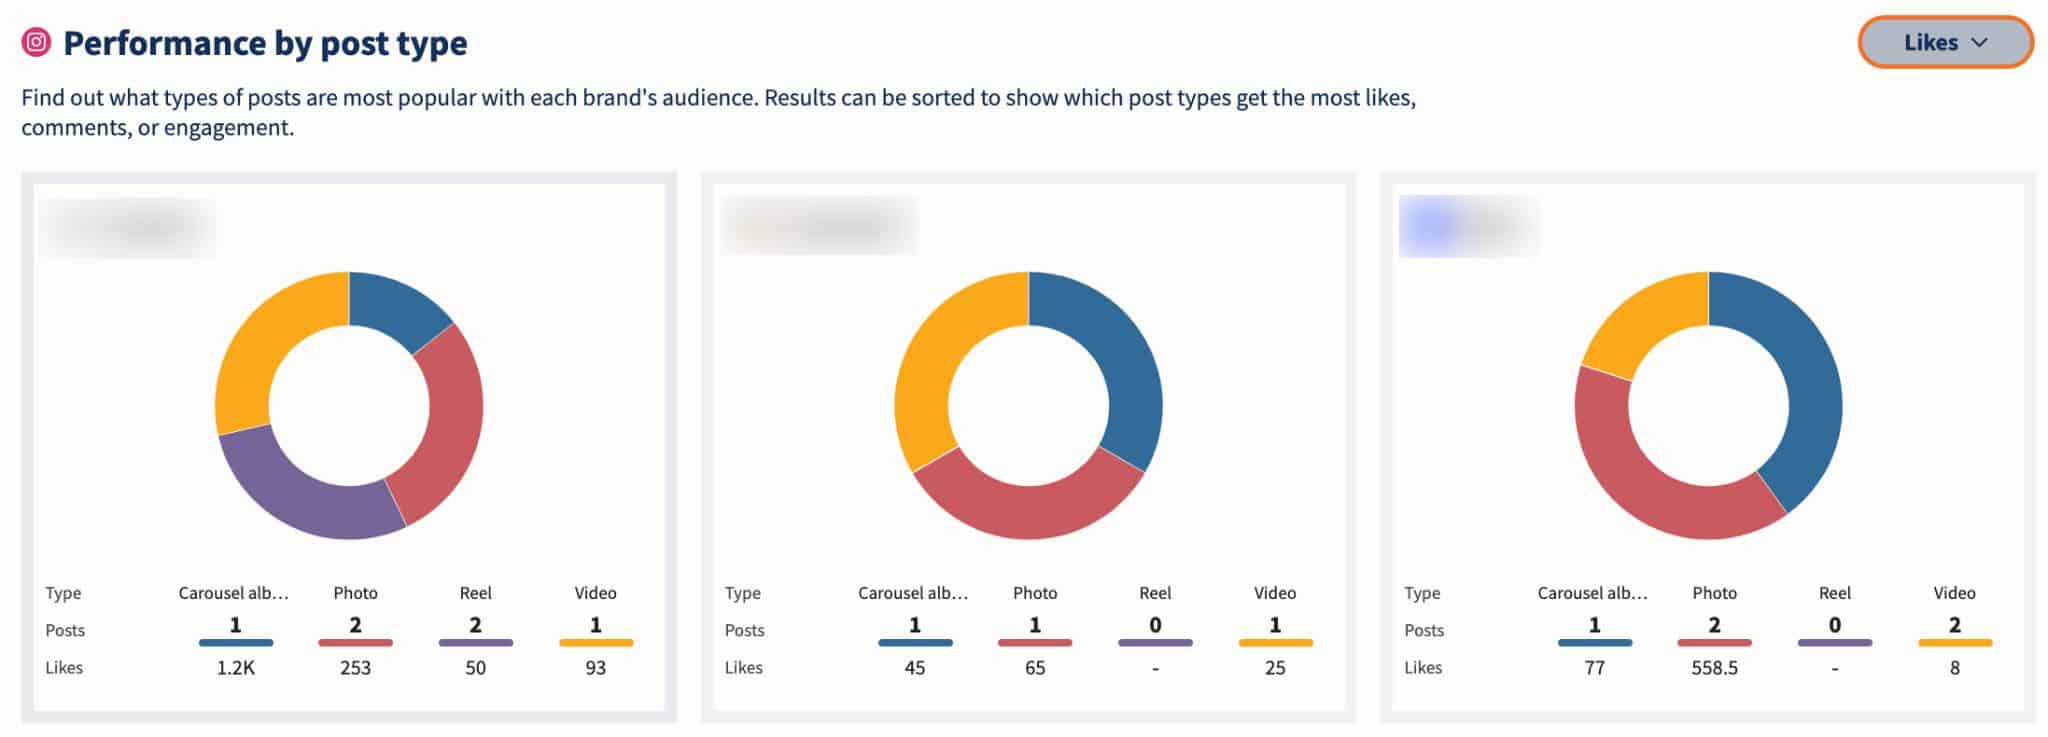
Performance by post type, where you can find out what types of posts — photos, videos, carousels, or Reels — are most popular with each brand’s audience. Results can be sorted to show which post types get the most likes, comments, or engagement.
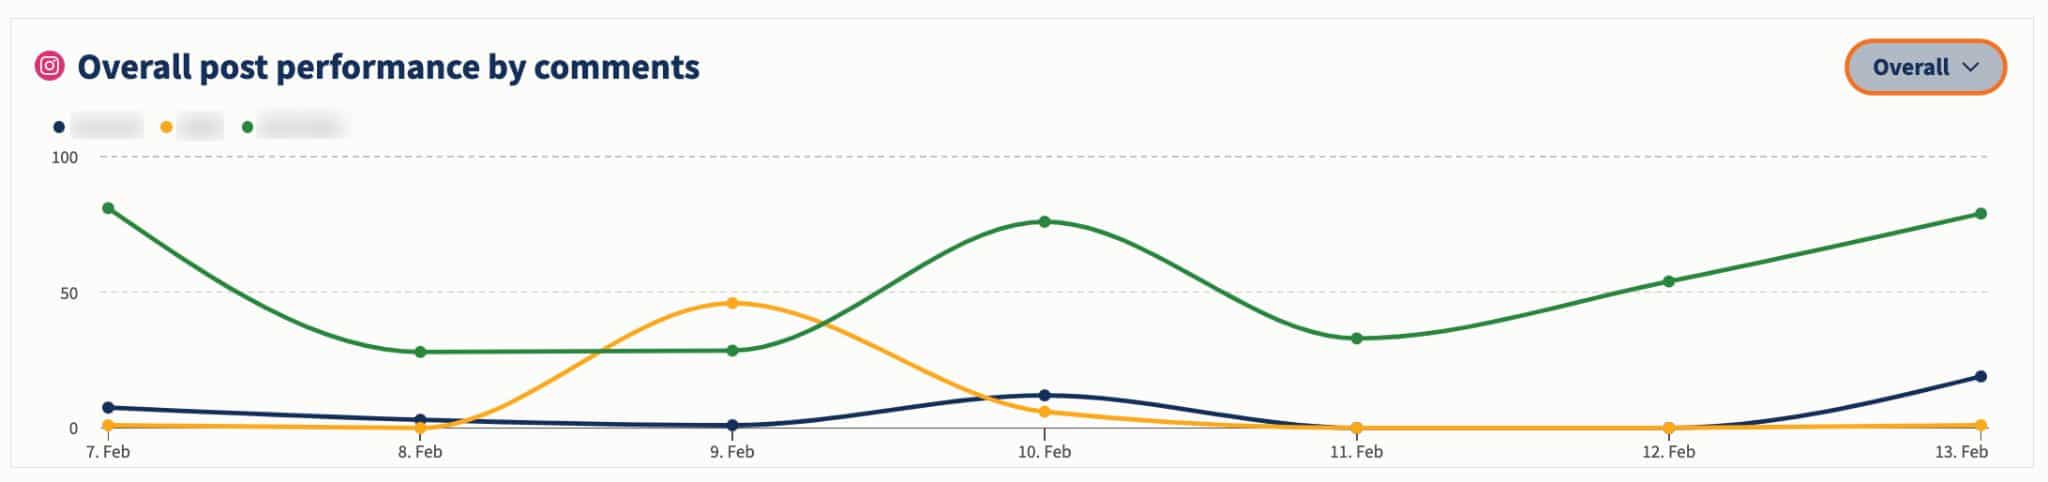
Post performance (by comments, likes, or estimated engagement), where you can see how you and your competitors did every day within the specified timeframe — all in one easy-to-read graph. You can drill down results by post type, or stick to the overall view.
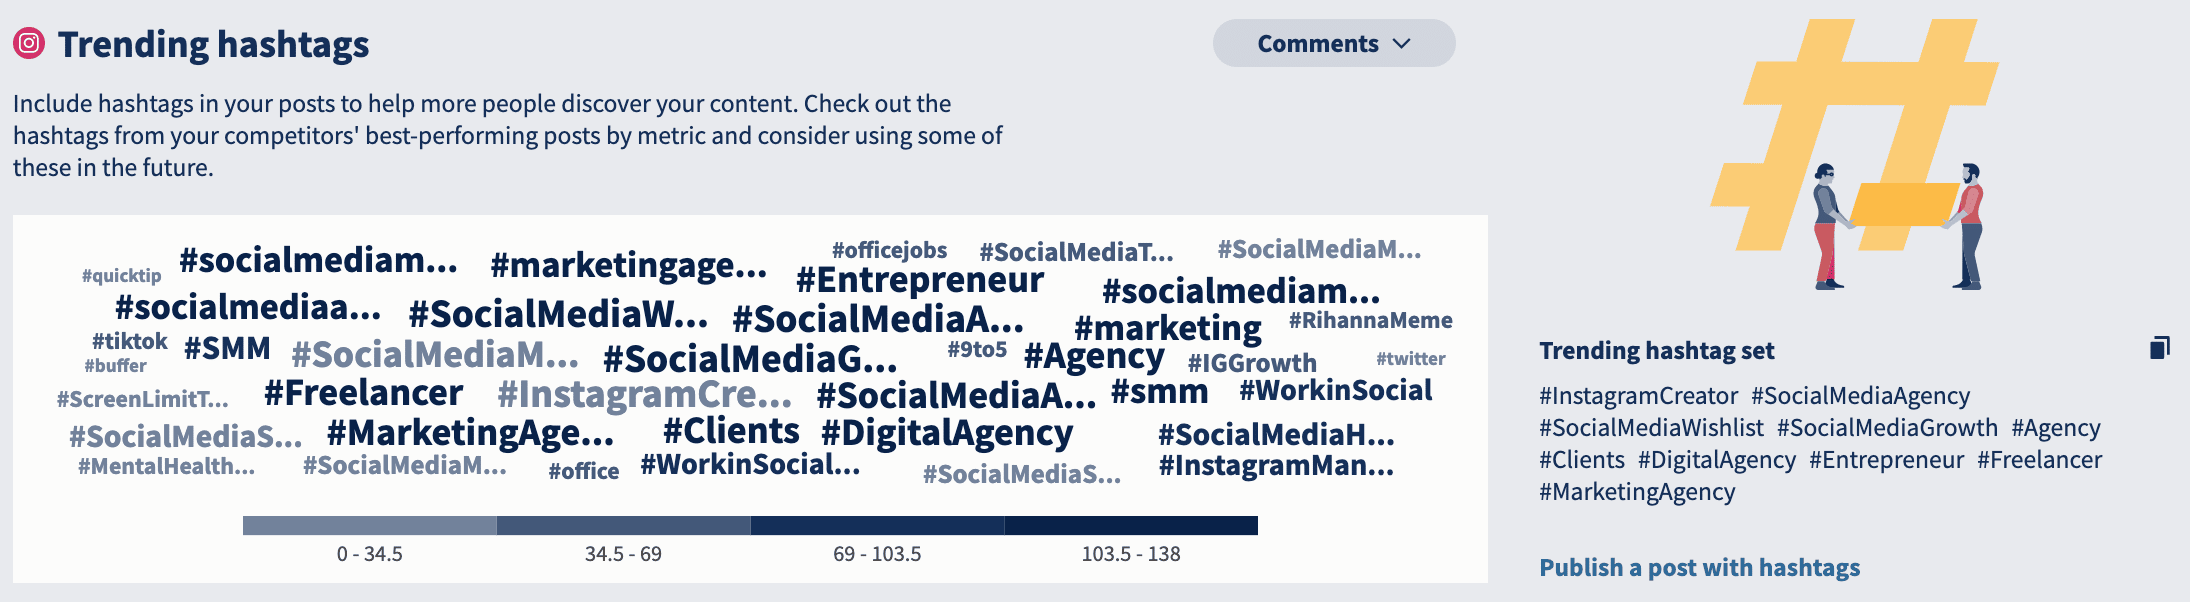
Trending hashtags… which speaks for itself.
Post length, where you can find out how many characters and hashtags, on average, your competitors use in their posts.

Learn more about competitive analysis in Hootsuite Analytics. The feature is available in all paid plans.
#1 Analytics Tool for Growth
Beautiful reports. Clear data. Actionable insights to help you grow faster.
Start free 30-day trial2. Synapview
Ready to go beyond social media competitor analysis? Synapview is an app that lets you monitor competitors and hashtags on Reddit and blogs, giving you in-depth insights into your competition across multiple platforms.

3. Mentionlytics
Mentionlytics is a social media monitoring tool for conducting a social media competitive analysis. You can discover everything being said about your brand, your competitors, or any keyword on X, Instagram, Facebook, YouTube, Pinterest, and web sources (news, blogs, etc.).
Plus, with it’s handy “sentiment analysis” feature, you can see not only what is being said about your competitors but how it’s being said. This can help refine your messaging to better match what audiences are responding to.
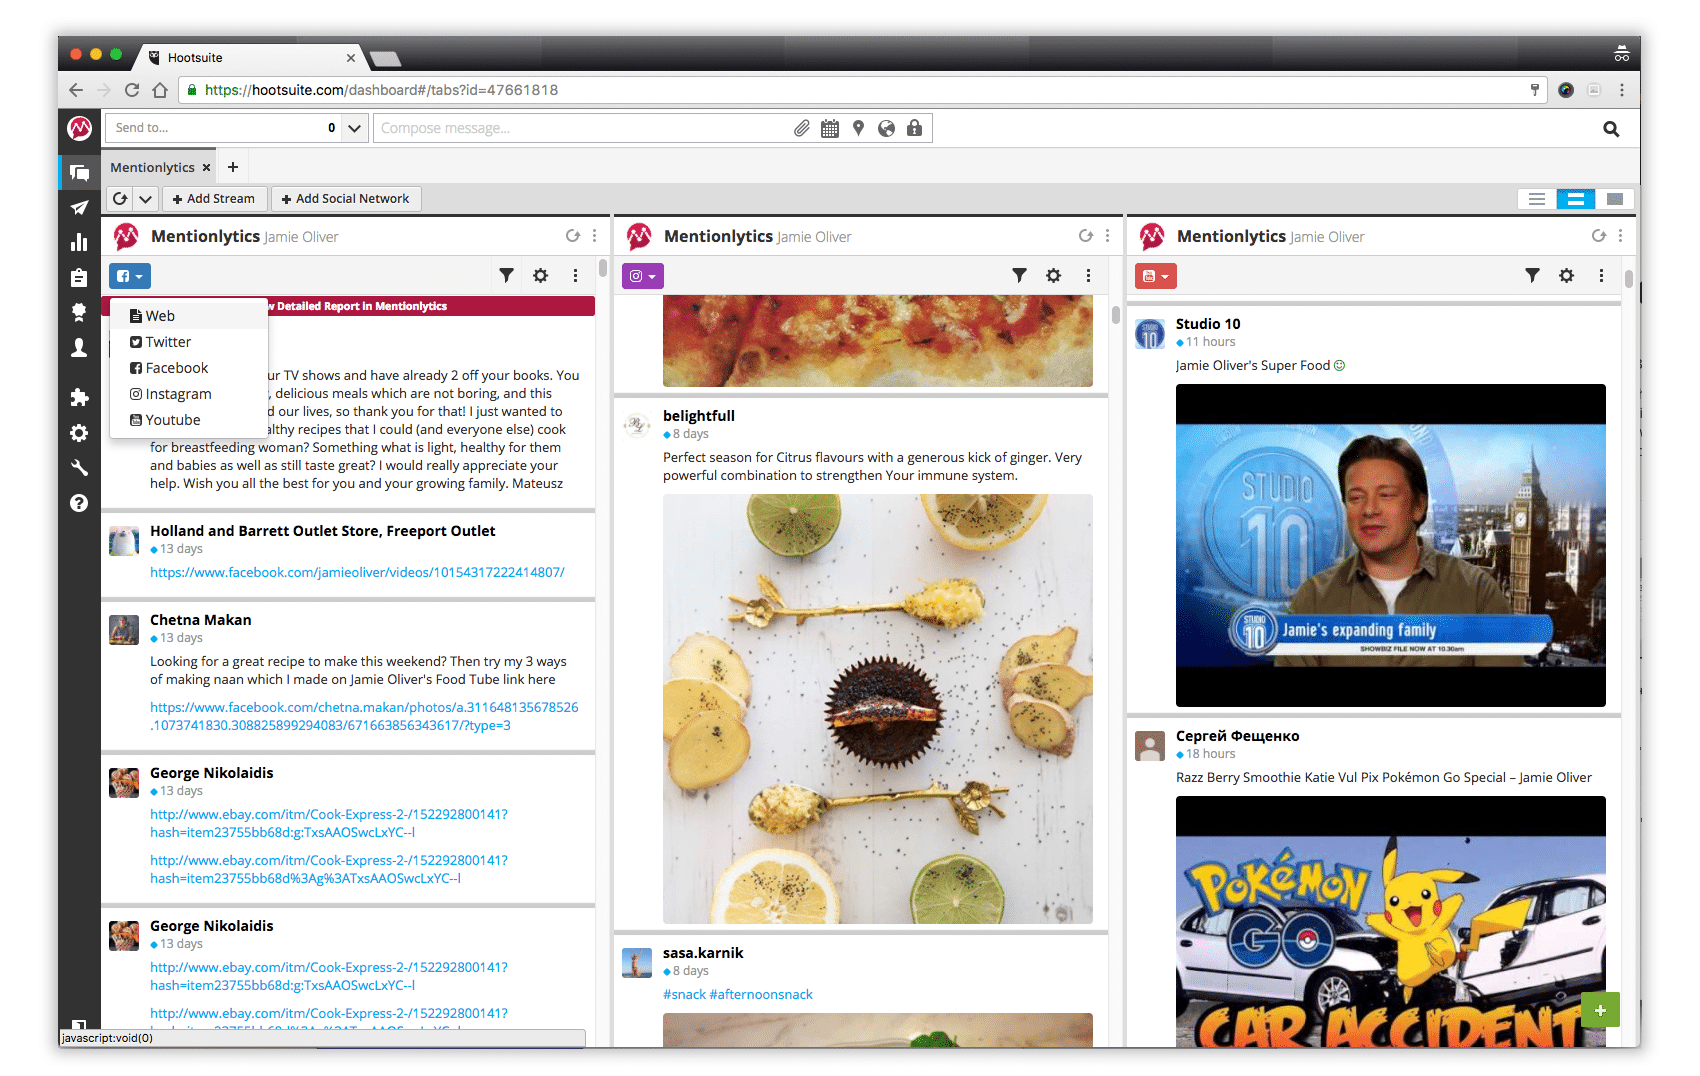
PSA: Mentionlytics integrates with Hootsuite so you can see everything it pulls in your Streams.
4. Sprout Social
Sprout Social is a comprehensive social media management tool that offers some competitive analysis features.
Sprout’s tools help users track and measure growth across competitors’ social accounts and easily check how those stats compare to their own. A word cloud solution that surfaces trending topics and keywords is also available.
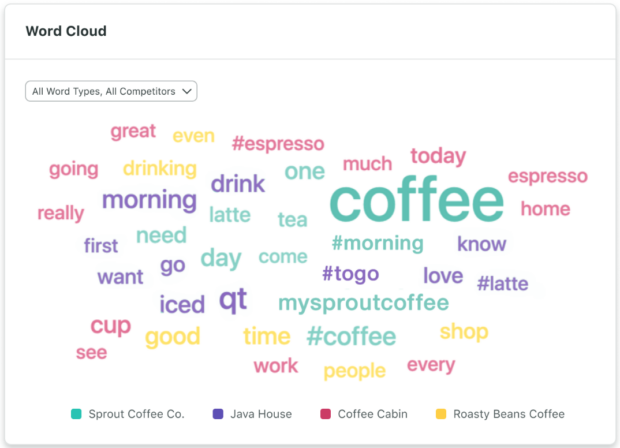
Source: Sprout Social
Check out our detailed side-by-side comparison to see how Sprout Social stacks up against Hootsuite.
Use Hootsuite to crush the competition on social media. Manage all your profiles, track competitors and relevant conversations, improve performance, and much more — all from one simple dashboard. Try it free today.
The post Social media competitor analysis: + free template for 2025 appeared first on Social Media Marketing & Management Dashboard.
* This article was originally published here
Tuesday, February 25, 2025
How the LinkedIn algorithm works in 2025
The LinkedIn algorithm operates a bit differently than most other social platforms’ — it’s specifically designed to prevent content from going viral.
Yes, you read that right. The LinkedIn algorithm is designed to fill user’s feeds with only the most relevant professional advice and expertise, which means a completely different approach than the one you’d use for, say, TikTok.
New LinkedIn algorithm updates prove that focusing on your own expert knowledge and engaging with your community is more important than ever. Here’s what you need to know to make the algorithm work for you in 2025.
What is the LinkedIn algorithm?
The LinkedIn algorithm is a recommendation system that selects the posts that each user sees in their feed.
The topics, people, and types of posts an individual is most likely to engage with determine what their LinkedIn feed will look like.
LinkedIn has over one billion members (and counting). Its algorithm processes billions of posts per day, all to make the newsfeed as interesting and informative as possible for every user.
LinkedIn says, “The primary goal of any algorithm is to make the platform enticing so that people spend more time online, ultimately leading to increased revenue from advertising. Therefore, those who create engaging content are indispensable to any algorithm.”
The more time you spend getting to know what works on the platform, the better the algorithm will work for you.
That said, LinkedIn is not a platform where you should expect your content to go viral. LinkedIn specifically says it “is not designed for virality.” It’s about sharing knowledge and updates with people who care about that information and can use it to advance their careers.
LinkedIn’s focus on business makes it a unique platform where users are already primed to hear from your brand, about your business, and about your industry.
How does the LinkedIn algorithm work?
LinkedIn’s algorithm in 2025 is actually pretty transparent when you take the time to dive into the platform’s resources, like the Engineering Blog and LinkedIn Helper. (Or outside resources like the Hootsuite Blog!)
At a high level, the LinkedIn algorithm follows a three-step process to determine what appears in users’ feeds.
- Quality filtering. Posts are immediately classified as spam, low quality, or high quality.
- Engagement testing. The algorithm shows your post to a small sample of your audience to gauge initial interaction levels. If a post gets strong engagement within the first hour, LinkedIn pushes it to second and third-degree connections.
- Network and relevance ranking. LinkedIn prioritizes posts from people and topics you engage with the most.
Let’s get into those in more detail.
1. LinkedIn decides if your post is spam or high-quality content
The LinkedIn algorithm begins by classifying your post to determine whether it violates any of the platform’s spam guidelines or other community policies.
If the AI detects clear violations, the content is filtered. LinkedIn says violations can include:
- Spammy behavior. This can include tagging unrelated individuals.
- Low-quality content. The more errors, the higher the likelihood of the content being flagged.
- Excessive use of tags. 3-5 tags per post is best.
- Too frequent posting. Try to maintain a minimum of 12 hours between posts.
If the content type is not clear enough to filter automatically, it’s sent for human review. If it passes the human review, the content continues to be displayed on the platform with monitoring.

2. LinkedIn puts your post to the test
Once the LinkedIn algorithm has established that you haven’t posted something too spammy, the network distributes your post to a small group of your followers and watches for engagement signals.
In this first hour (sometimes called “the golden hour”), LinkedIn is trying to determine how valuable your post is to people in your immediate and extended professional networks. If your content passes the test, it’ll earn wider distribution.
Engagement is a good signal that your post has value, but not all engagement is created equal. The algorithm specifically values meaningful engagement. That means thoughtful comments from people in relevant fields.
(This is why joining a LinkedIn pod is not likely to cause a great boost in your distribution unless it’s a highly targeted pod of people who are genuinely interested in your content anyway).
Engaging with others’ content by leaving thoughtful comments builds relationships and improves your own visibility. The more you interact, the more the LinkedIn algorithm will push your content to a wider audience.
3. LinkedIn delivers your most valuable content to relevant users
Who gets to see your post from here depends on three ranking signals:
Identity
LinkedIn uses a member’s personal profile to understand what their preferences for content are. Members’ location, career, and skills can all factor into whether or not your content is shown to them.
Content
The platform analyzes how relevant your content is to other LinkedIn users’ interests based on performance, the content topic and type, and how old it is. It does so using signals like:
- How long users spend reading or engaging with a post (also known as “dwell time”)
- How often the content has been viewed and engaged with
- How relevant the topic is to a user
- Whether the content shares knowledge or professional advice
- The language of the content
- How professional and constructive the conversation in the comments section is
- Which companies, people, and topics are mentioned
LinkedIn also prioritizes the poster’s own topic authority. If you’ve posted consistently about one niche or topic, LinkedIn will identify you as an expert and share your content more widely.
Member activity
The LinkedIn algorithm determines a user’s interests based on their past actions on the platform.
Users will see more content similar to topics they have engaged with in the past and from the people they engage with most frequently. Hashtags they follow, first-degree connections, and other members who follow them are also factors.
Recent LinkedIn algorithm changes (2025 update)
Like all social platforms, LinkedIn is constantly tweaking its algorithm. While the core ranking factors remain the same, a few new updates in 2025 might impact how your content performs.
1. Improved visibility for experts
LinkedIn now emphasizes expertise more than ever. Posts with original insights, industry trends, or actionable advice are now more likely to reach larger audiences.
In 2025, the platform also rewards its most active creators and subject-matter experts. If you consistently post about a particular topic, LinkedIn is more likely to recognize your authority and boost your content.
2. A move away from clickbait
LinkedIn’s algorithm is getting better at detecting engagement bait (like “Comment YES if you agree!”) and prioritizing meaningful conversations instead.
Posts that generate discussions, especially those with thoughtful comments, are more likely to reach a wider audience.
3. Rewarding high-engagement posts
LinkedIn continues to refine its “golden hour” system. Posts that get strong interaction in the first hour will now be shown to second- and third-degree connections more frequently.
The platform is also placing more weight on dwell time, meaning posts that keep users engaged for longer will see better distribution.
4. Native content gets a boost
If you’ve noticed fewer external links in your feed, there’s a reason. LinkedIn is pushing more native content, like text posts, carousels, and videos, over posts with outbound links.
If you need to share a link, consider placing it in the comments instead of the main post.
Which types of content perform best on LinkedIn?
Conversational content
LinkedIn’s best practices in 2025 (as in years past) include community building.
Posts that engage people will please the algorithm, so try to get your audience involved.
Posts that ask questions or share personal stories can get more comments and likes, which helps boost your reach. Native content like text updates, videos, or polls tends to perform better since LinkedIn prefers users to stay on the platform rather than clicking on external links.
Imagery and video content
Many platforms have seen a push toward video content as it garners views and typically has higher engagement.
LinkedIn is actually favoring video content extremely highly now, as a shift to catch up with other platforms. I’ve seen some really good success and reach with authentic, camera-facing video content sharing insights, advice, and ideas.
In fact, LinkedIn videos get five times the engagement, and Live video gets 24x! (See Mailchimp’s video post below for proof of that high engagement.)
Posts with imagery tend to do better, too, gaining twice as many comments as purely text posts.
Value-driven posts
When you give your audience something they can actually use, you’ll see more people saving your posts.
I’ve been testing various types of content formats for my LinkedIn profile. Documents, or carousels, turned out to be the most valuable assets in terms of reach. Most of my viral posts on LinkedIn were documents.
The trick lies in creating value for the target audience. ‘Creating value’ is misunderstood a lot. Value is almost always any relatable tip that your audience can implement immediately. This comes after a lot of audience research and practice.
Offering something substantial for your readers without asking for anything in return can offer big dividends in terms of higher engagement and reach.
How to optimize your content for the LinkedIn algorithm
If you’re struggling with what to post on LinkedIn, we’ve got you covered. Here are some content ideas you can totally steal.
We go into way more detail below, but if you’re looking for the tl;dr, here are five quick wins to boost your reach on LinkedIn:
- Grab ’em with a strong hook. The first three lines (also known as your hook) are critical to keep audiences engaged. Try starting with a bold statement or a question.
- Use 3-5 hashtags for discoverability. Choose these hashtags carefully! LinkedIn may flag your post as spam if you use more than five or irrelevant hashtags.
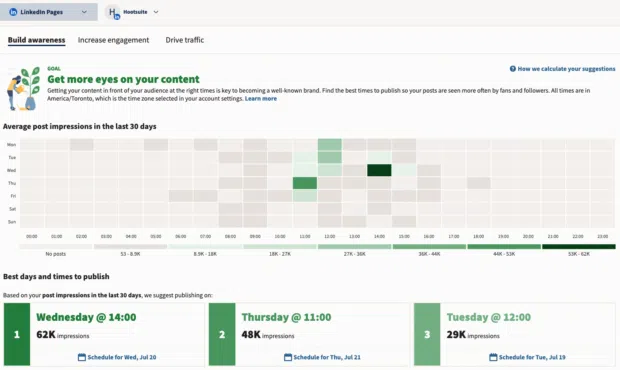
- Post when your audience is active. Use tools like Hootsuite’s Best Time to Publish feature to find your ideal time.
- Encourage engagement in the comments. A clear CTA can make a big difference here. Try ending with something like “What do you think? Share your thoughts below!”
- Take advantage of employee advocacy. Encourage your internal team to reshare and comment on your posts.
Ready for more detail? Keep reading!
1. Be relevant and informative
Remember, the LinkedIn algorithm now surfaces knowledge members are likely to be interested in based on their skills and interests.
That means you need to know the skills and interests of the target audience you’re trying to reach. Ideally, those skills and interests should have significant overlap with your own so that you can speak as a credible expert on relevant topics.
For example, this Hootsuite post on LinkedIn shares relevant December calendar dates for social media managers. Social media managers are Hootsuite’s main target audience, so it received a lot of reposts.
Start by looking at metrics and intel from your other social networks. Graph interests and get a better understanding of what your audience cares about. You can even use a competitor’s audience to build personas. Then, map those interests back to your own skill sets and areas of specialist knowledge.
Use these findings as starting points for your LinkedIn social media marketing strategy.
2. Schedule your posts for the best times
Good engagement in the first hour is critical. You won’t get the conversation going if your audience is fast asleep.
For maximum exposure, schedule your posts for when the majority of followers are usually online and most active on the platform.
Generally speaking, the best time to post on LinkedIn is either Tuesday morning before 10 am or Thursday evening after 6 pm. But every audience is unique. The Best Time to Publish function in the Hootsuite dashboard generates a personalized recommendation to maximize engagement with your own network.
Be sure to share content regularly. LinkedIn data shows that posting weekly leads to a two-times lift in engagement.
A tip for improving performance is timing and consistency. We’ve found that posting during peak hours (think mornings and early afternoons) gets the best traction. Combine that with a steady posting schedule, whether it’s once or twice a week, and you’ll start building momentum.
3. Promote your posts (on LinkedIn and off)
One of the best ways to increase engagement on your posts is to increase the number of people who will see them.
There are several tactics to gain extra traction on LinkedIn:
- tag people and relevant company pages
- use keywords strategically
- include relevant hashtags
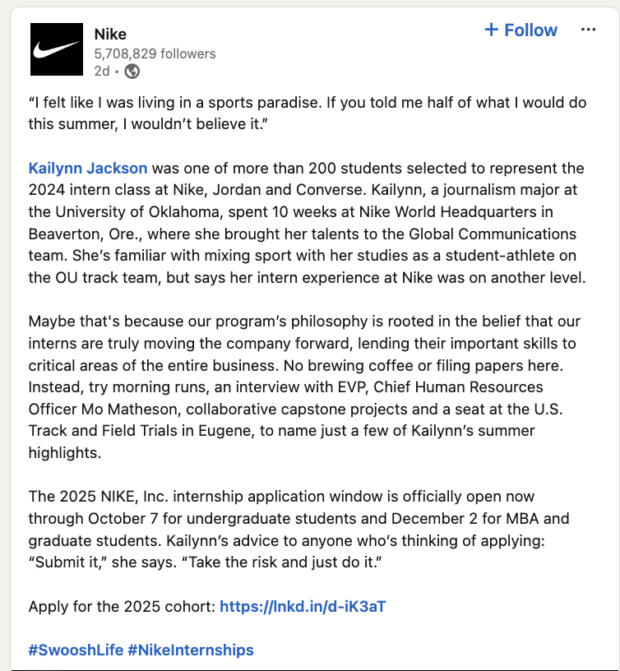
And B2B marketers, heads up: branded hashtags also have potential here. If you create a hashtag worth following, the algorithm will surface posts that use it to the hashtag’s followers, like Nike’s #SwooshLife below.
For more tagging tips, read our LinkedIn hashtag guide or watch this video:
Tip: Not all promotion needs to happen on LinkedIn.
If you think a recent post might be of interest to employees or customers, share it in Slack or in your e-newsletter.
This can be a great way to engage inactive LinkedIn members with your content. In turn, the engagement will improve your ranking with the algorithm. It’s a win-win.
4. Encourage meaningful engagement
LinkedIn’s algorithm rewards relevant and meaningful engagement. Generic comments from random people won’t extend your reach. You want comments that show people in a relevant field have understood and thought about your post.
Try asking a question that encourages your audience to share their opinions or insights. Posing the right questions builds your personal brand as a thought leader and encourages those meaningful conversations.
It also provides an opportunity to learn more about your audience’s interests so you can develop even more relevant content.
Finally, be sure to join the conversation yourself. Rather than a one-way stream of comments, LinkedIn wants to see an active conversation with you as a primary participant.
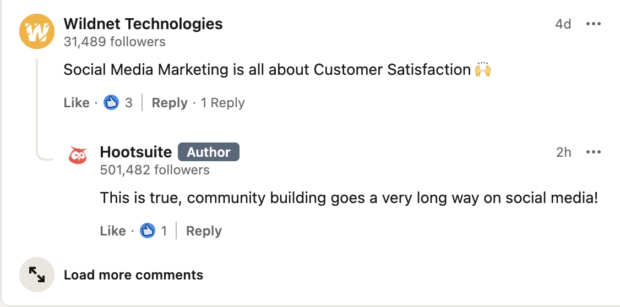
A tool like Hootsuite Inbox ensures you never miss a comment or mention, so you can show your followers (and the algorithm) that you’re active, informed, relevant, and engaged.
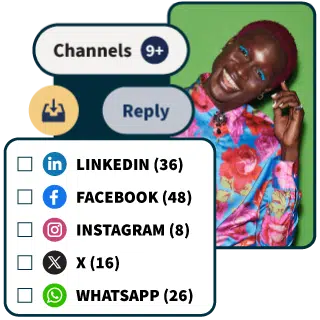
Reduce response time (and your workload)
Manage all your messages stress-free with easy routing, saved replies, and friendly chatbots. Try Hootsuite’s Inbox today.
Book a Demo5. Craft original content with a unique perspective
Your social media strategy can’t rely on other people’s content. Original posts go a lot further and spark more engagement than a shared post.
If you’re going to repurpose content or have a user-generated content strategy, try to find a way to reframe it, adding your own perspective and insights.
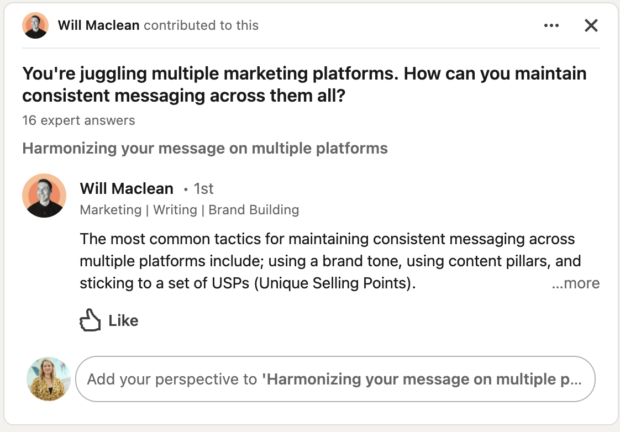
Remember, LinkedIn wants to surface content that shares knowledge and builds connections. Adding your own perspective is critical to both. Contributing to collaborative articles can be a great way to flex your perspective.
Don’t forget that adding a conversation-provoking question can really get people talking. (Psst! Our AI-powered LinkedIn post generator can help with that.)

Craft perfect posts in seconds
OwlyWriter AI instantly generates captions and content ideas for every social media network. It’s seriously easy.
Start free 30-day trial6. Optimize with analytics
If something performs well, do it again.
Use Hootsuite Analytics to understand what posts perform best and why. This is an important way to interpret the algorithm based on your own past performance.
Maybe it’s because you posted them all at a specific time? Or, maybe each post posed a question?
Whatever it is, find out and use these insights to refine your LinkedIn content strategy.
Regular posting, responding to comments, and personalizing replies help to build loyalty [on LinkedIn]. Changes in content strategy should be informed by analytics, including audience demographics and engagement rate.
7. Post LinkedIn-appropriate content
Users are on LinkedIn to be a part of the professional world. You need to consider that when you’re crafting your posts.
Some self-promotion is okay, but this isn’t a place to post a video of your dog’s birthday party. Rather, keep the focus on business.
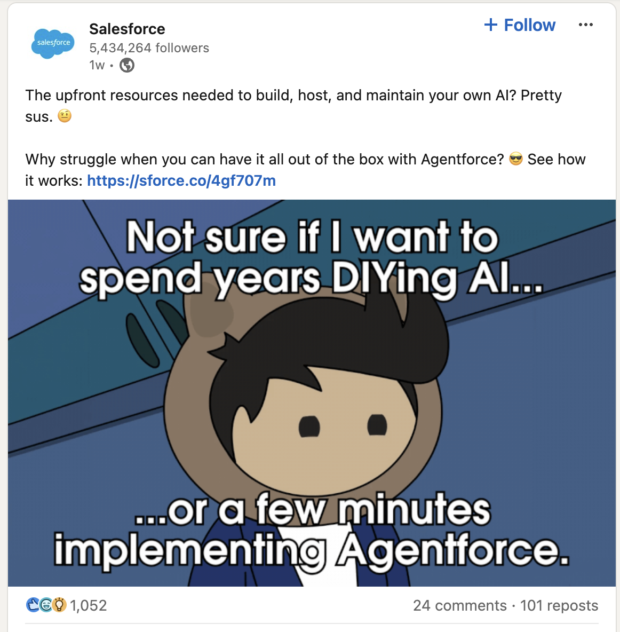
Know the niche and live in it. Your vibe on LinkedIn doesn’t need to be totally heartless, roboto-corporation. Authenticity, humanity, and humor are more than welcome and are, in fact, rewarded.
Assume a brand voice that’s friendly and approachable. Accounts that tow the company line or use too much corporate jargon may deter the real human beings on LinkedIn from interacting.
For those looking to improve their LinkedIn performance, my top advice would be to find your unique voice and perspective. Share authentic stories and experiences that resonate with your audience, rather than simply repeating generic advice.
8. Use native platform features
LinkedIn doesn’t want you to leave the platform. So, it’s no surprise that the algorithm doesn’t prioritize posts with outbound links as much as other types of content.

Make sure your LinkedIn strategy takes advantage of all of the platform-specific tools at your disposal. Use native features like polls to engage your audience without leading them elsewhere.
Easily manage your LinkedIn Page and all your other social channels using Hootsuite. Schedule and share content (including video), reply to comments and engage your network — all from one streamlined dashboard. Try it free today.
With files from Liz Stanton.
The post How the LinkedIn algorithm works in 2025 appeared first on Social Media Marketing & Management Dashboard.
* This article was originally published here
Subscribe to:
Comments (Atom)
-
You could spend your days trying to outsmart Instagram’s ever-changing algorithm. Or, you can take the direct route with Instagram ads. ...
-
Social Media Advertising Market Worth $262.62 Billion by 2028 - Million Insights 69News WFMZ-TV * This article was originally published ...
-
Wondering if you should invest your time and energy in creating content for Facebook Stories ? Facebook Stories are short user-generated vid...

